
- Joined
- Feb 21, 2003
- Messages
- 374
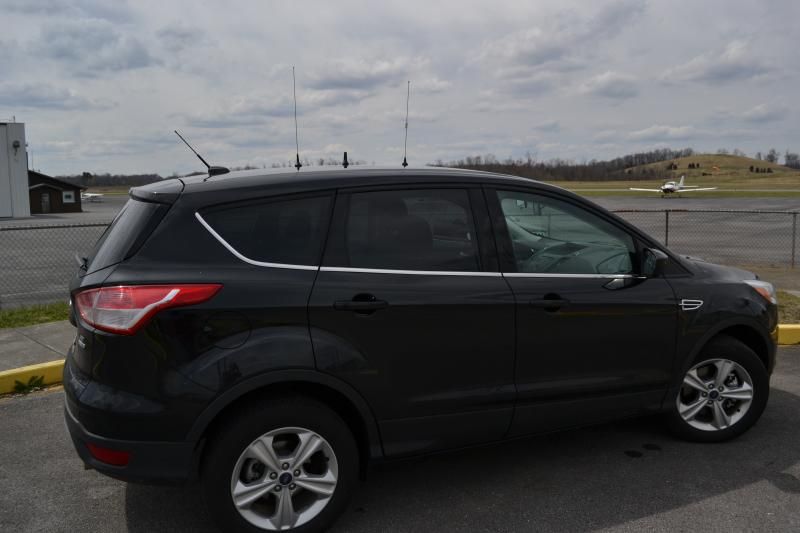
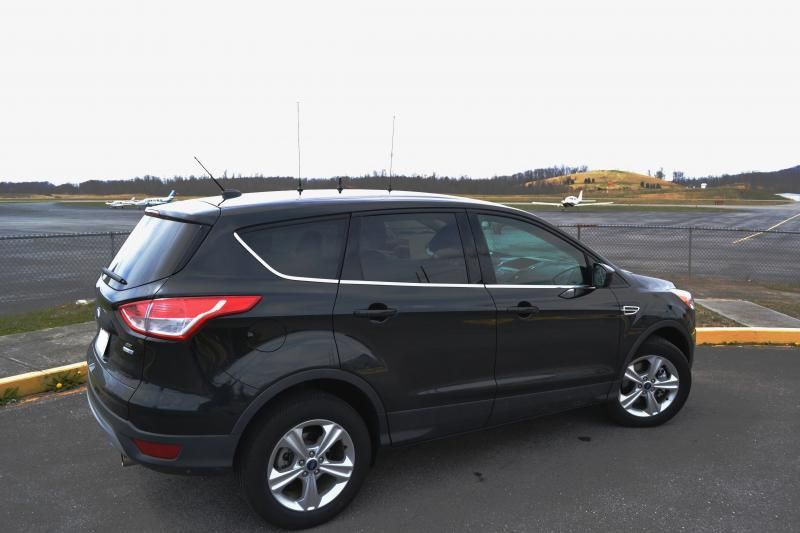
2013 Ford Escape SE 2.0 Turbo AWD
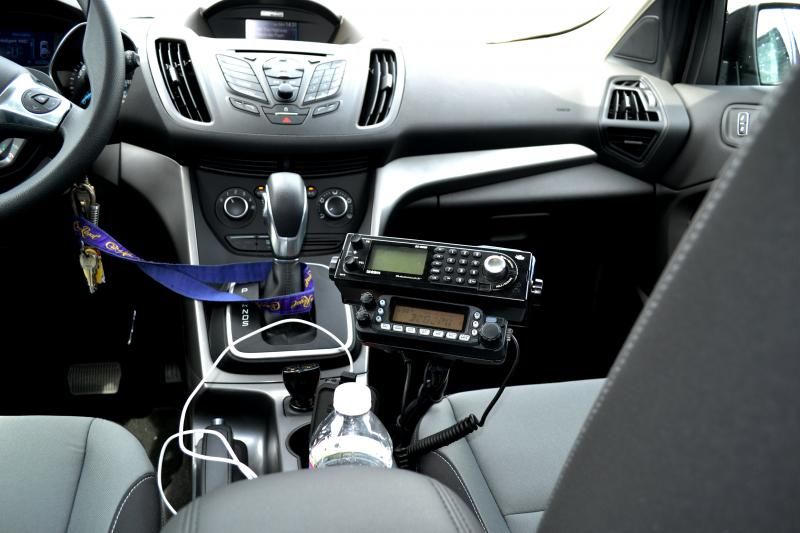
Yaesu FT-7800 (W/ Remote Head)
Uniden BC396XT (W/ BC-RH96 Remote Head)
Cobra 75WXST CB-Radio (Remote Mounted / wired but not using currently)
Opek DB2 - 2M/440 Quarter Wave NMO
Antenex Phantom Elite Mobile Hotspot Antenna NMO
Antenex AB150 Quarterwave cut to 155 MHz NMO
Lido Gooseneck Mount / Floor Bracket modified to fit seat track (less flexing)
Motorola Speaker
Radio Shack Amplified Speaker
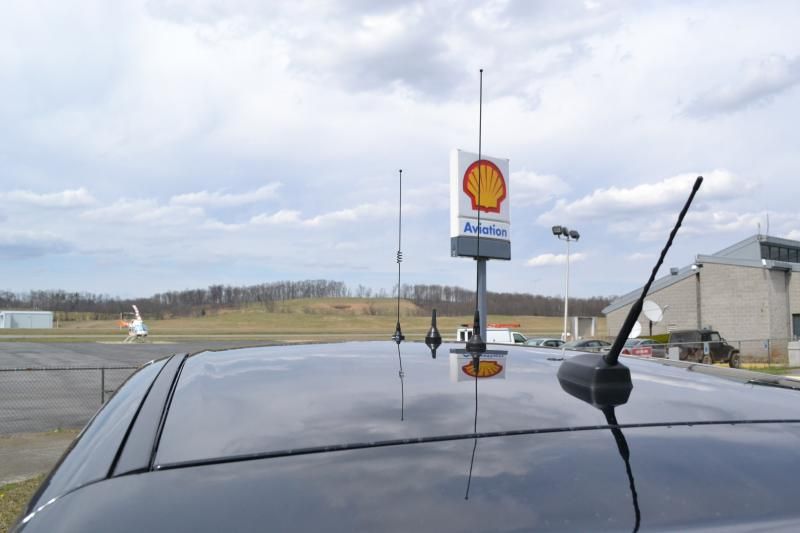
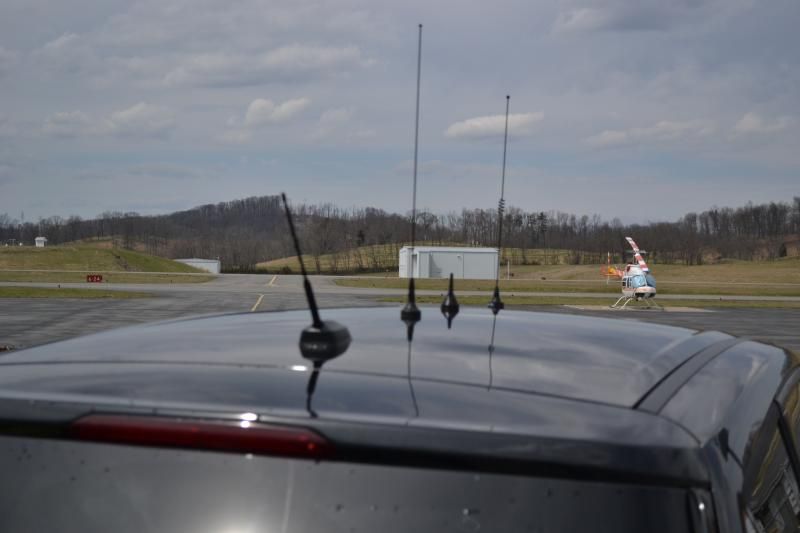
New Vehicle, lets drill some holes!
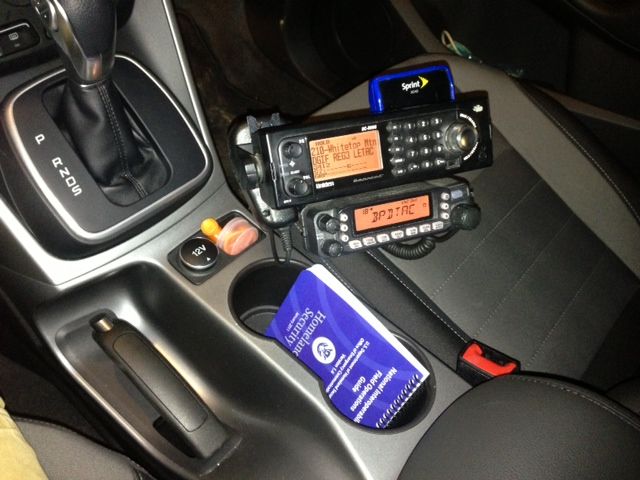
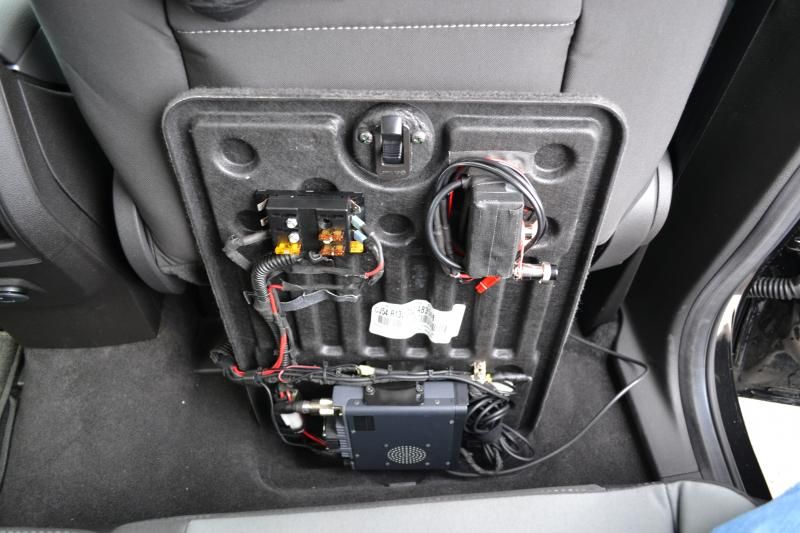
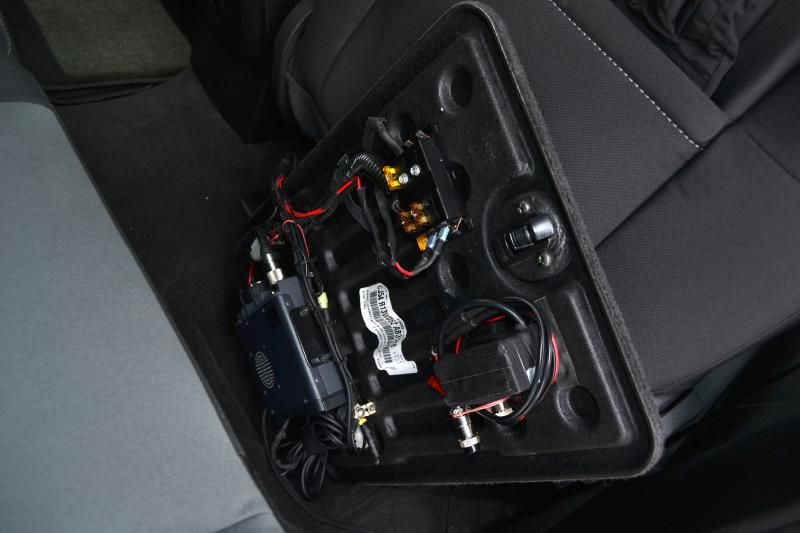
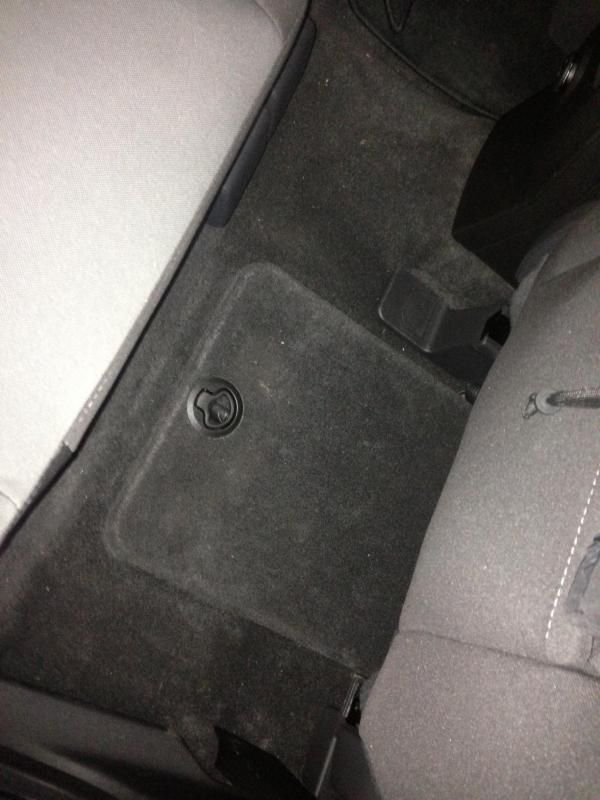
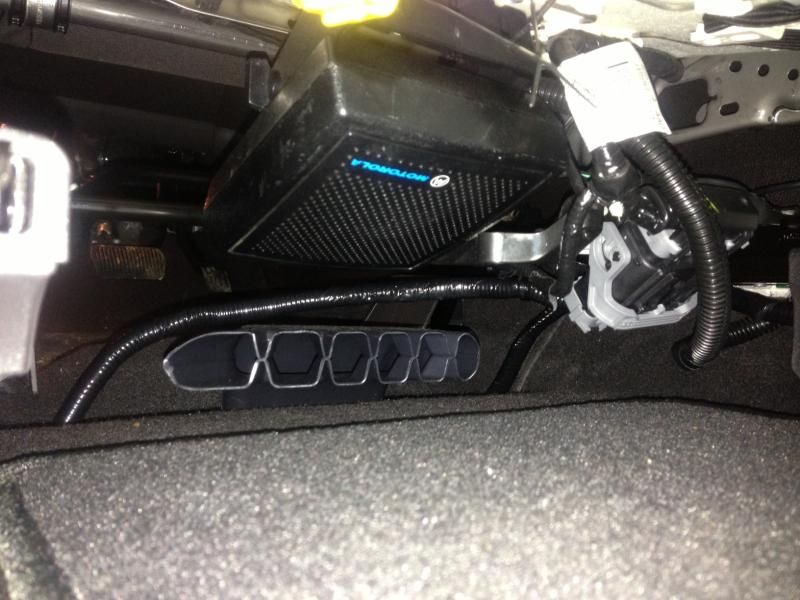
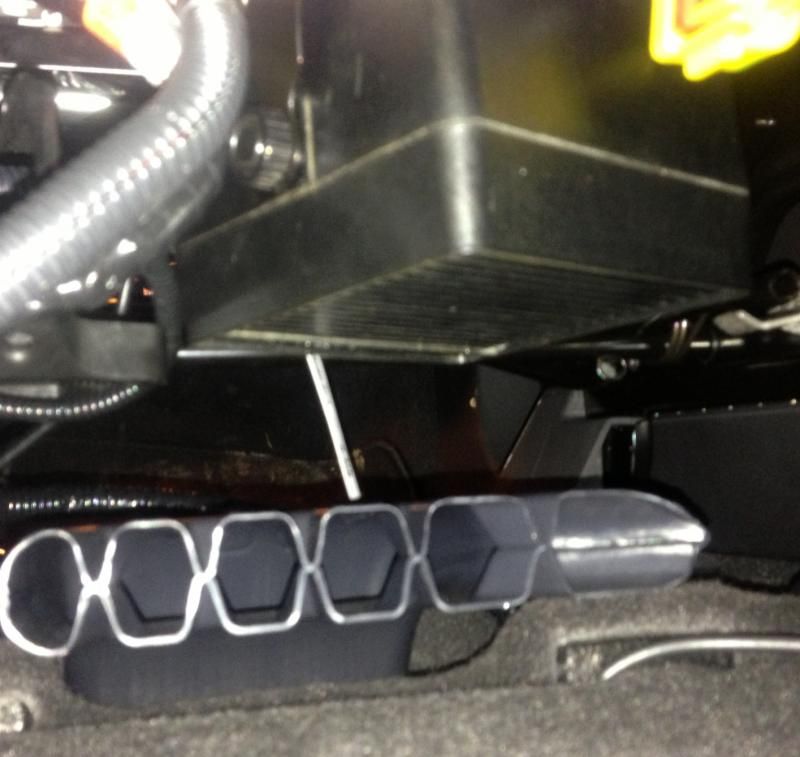
Radios Mounted to bottom of storage hatch lid under passenger seat. Fuse distro box for easy future add-ons....one run of wire to the front with a lighter plug splitter for the remote head and scanner power....ran out of real estate in the box, so hid the 2 lighter plugs and splitter under the side of the transmission hump in the carpet fold... , grounds tied with a stainless steel bolt, homemade L bracket and lock nut..Everything attached with screws to the cover lid, stapled some Velcro to the lid too to help manage the cables, clearance is tight so several trial and error attempts till it was all snug inside. Heat shouldn't be an issue as I monitor 99% of the time, however planned the location so a few holes could be drilled in the lid for ventilation if needed later. CB remote transceiver (top right) with a powerpole pigtail, I usually use a pre-fab cable that connects to the Yaesu power cable for power
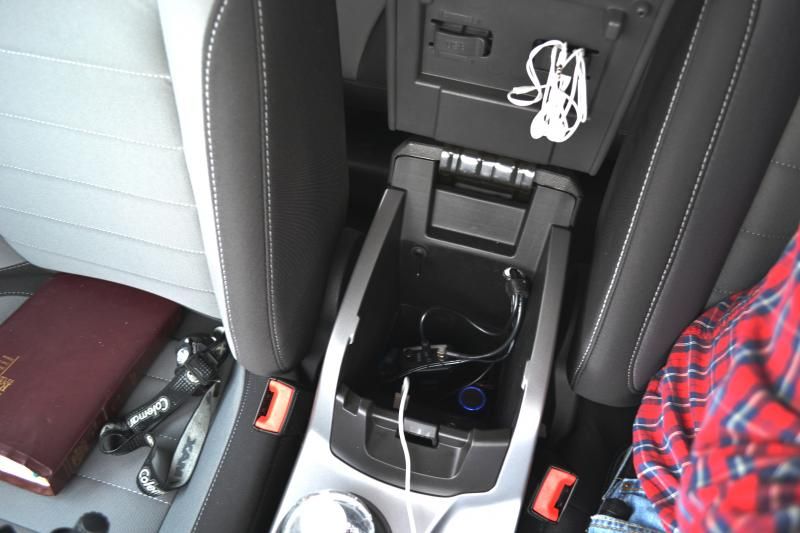
Center console houses 396 and a switch for the amplified speaker
Speakers mounted under the seats to the seat bottom with nylon ties.
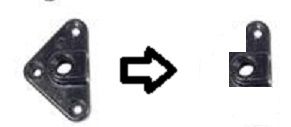
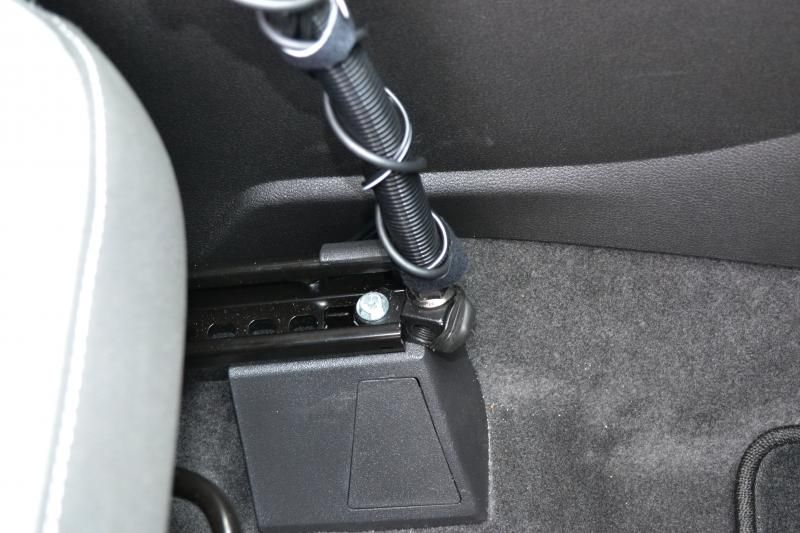
Lido goose neck floor mount modification done with a cut-off wheel. The standard L braket seat bolt mount was just too flimsy, access panel pops open with a nylon pry tool for easy access to the bolt hole.
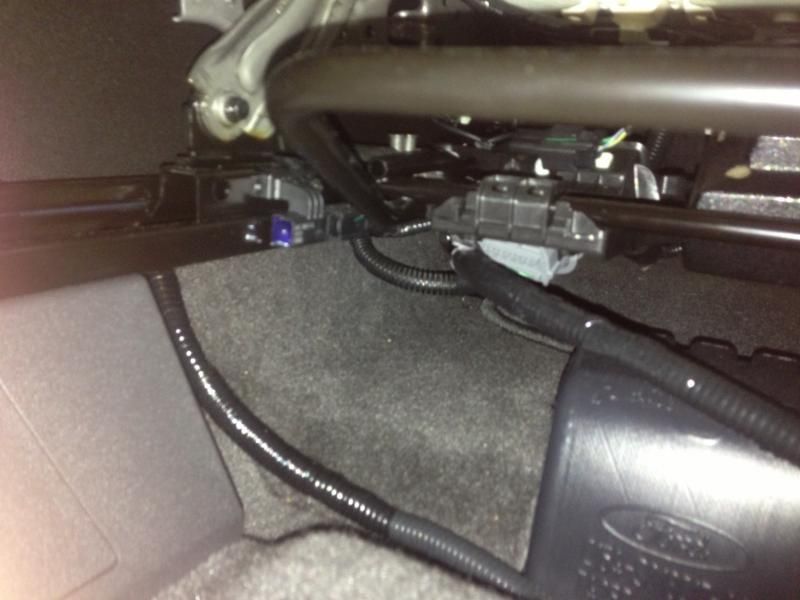
Power cable routing from driver side firewall plug > under inside door floor trim > under seat > under center console > to radio under passenger seat. Knee air bag and brake linkage prevented routing under steering wheel. Power cable is #10 stranded, hot wrapped with friction tape and both inside split loom, wrapped with high heat tape where under the engine compartment.
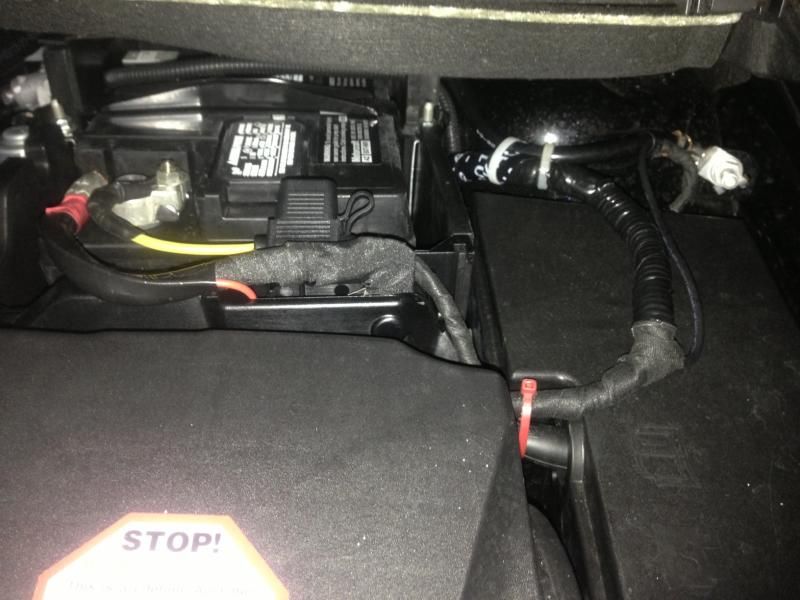
Battery connection with a waterproof fuse holder, picked up the ground on the fuse box attachment bolt with a washer.
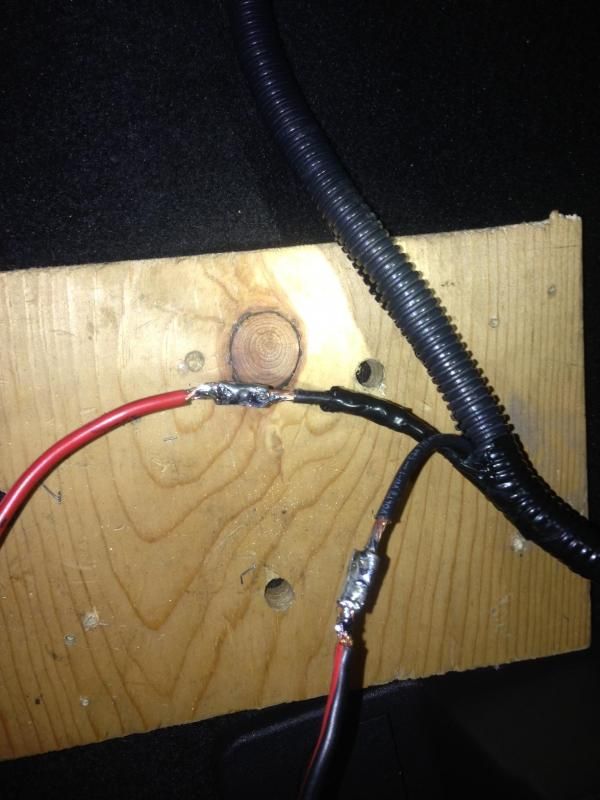
Soldered splice to cable with connector, removed plastic outer shell of a butt-connector...crimped and soldered..slice taped and heat shrank.
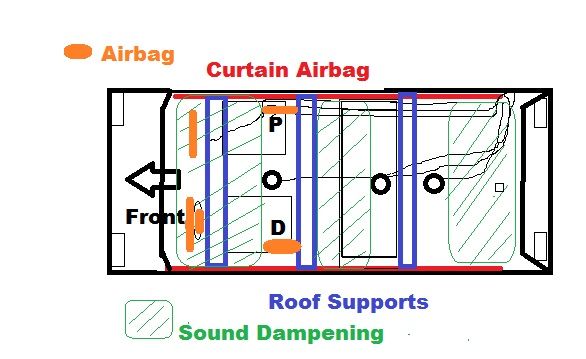
Antenna installation done by a close friend's custom audio install business, headliner removal took them several hours, as roughly indicated there wasnt many places to mount due to reinforced roof supports (that we didnt care to cut into) and concrete style acoustic dampening material. The rolled shape of the vehicle also limited placement further forward. Curtain air bags that run the length of the vehicle prevented cable drops into the door pillars, coax was routed aft and just behind the stop of the airbags, down under the cargo interior and back up under the floor trim. We were pressed for time and I didnt want to push my luck with my almost free installation...so sorry for no pics of the headliner dropped...since this is a new model there's hardly anything on the net about it and service schematics are extremely limited.
Yaesu FT-7800 (W/ Remote Head)
Uniden BC396XT (W/ BC-RH96 Remote Head)
Cobra 75WXST CB-Radio (Remote Mounted / wired but not using currently)
Opek DB2 - 2M/440 Quarter Wave NMO
Antenex Phantom Elite Mobile Hotspot Antenna NMO
Antenex AB150 Quarterwave cut to 155 MHz NMO
Lido Gooseneck Mount / Floor Bracket modified to fit seat track (less flexing)
Motorola Speaker
Radio Shack Amplified Speaker
New Vehicle, lets drill some holes!


Radios Mounted to bottom of storage hatch lid under passenger seat. Fuse distro box for easy future add-ons....one run of wire to the front with a lighter plug splitter for the remote head and scanner power....ran out of real estate in the box, so hid the 2 lighter plugs and splitter under the side of the transmission hump in the carpet fold... , grounds tied with a stainless steel bolt, homemade L bracket and lock nut..Everything attached with screws to the cover lid, stapled some Velcro to the lid too to help manage the cables, clearance is tight so several trial and error attempts till it was all snug inside. Heat shouldn't be an issue as I monitor 99% of the time, however planned the location so a few holes could be drilled in the lid for ventilation if needed later. CB remote transceiver (top right) with a powerpole pigtail, I usually use a pre-fab cable that connects to the Yaesu power cable for power


Center console houses 396 and a switch for the amplified speaker


Speakers mounted under the seats to the seat bottom with nylon ties.


Lido goose neck floor mount modification done with a cut-off wheel. The standard L braket seat bolt mount was just too flimsy, access panel pops open with a nylon pry tool for easy access to the bolt hole.


Power cable routing from driver side firewall plug > under inside door floor trim > under seat > under center console > to radio under passenger seat. Knee air bag and brake linkage prevented routing under steering wheel. Power cable is #10 stranded, hot wrapped with friction tape and both inside split loom, wrapped with high heat tape where under the engine compartment.

Battery connection with a waterproof fuse holder, picked up the ground on the fuse box attachment bolt with a washer.

Soldered splice to cable with connector, removed plastic outer shell of a butt-connector...crimped and soldered..slice taped and heat shrank.

Antenna installation done by a close friend's custom audio install business, headliner removal took them several hours, as roughly indicated there wasnt many places to mount due to reinforced roof supports (that we didnt care to cut into) and concrete style acoustic dampening material. The rolled shape of the vehicle also limited placement further forward. Curtain air bags that run the length of the vehicle prevented cable drops into the door pillars, coax was routed aft and just behind the stop of the airbags, down under the cargo interior and back up under the floor trim. We were pressed for time and I didnt want to push my luck with my almost free installation...so sorry for no pics of the headliner dropped...since this is a new model there's hardly anything on the net about it and service schematics are extremely limited.

") those things are handy.
those things are handy.