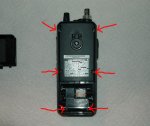
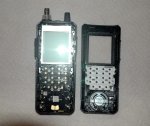
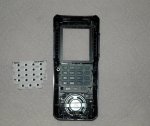
Remove the six screws. Hold the scanner with keys facing down. Gently pull the case apart. Remove the contact pad and the keypad membrane.
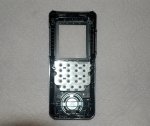
You can use canned air or a microfiber cloth to clean the backside of the front lens assy. Reassemble the parts in the reverse order paying attention to the contact pad making sure the black contact point's are facing the correct direction. Attach the front case cover back to the back cover assy and screw the case back together.
You can use canned air or a microfiber cloth to clean the backside of the front lens assy. Reassemble the parts in the reverse order paying attention to the contact pad making sure the black contact point's are facing the correct direction. Attach the front case cover back to the back cover assy and screw the case back together.
Last edited: