RocketMan1
Member
First I'd like to thank TeRayCodA for the detailed picture of the Scantenna, this project wouldn't have been possible without it.
The material I was going to use, 1/8" solid aluminum rods, was sent to the scrap yard before I could get it. The only choices left were either some salvaged T.V. elements, or some angled aluminum, just shy of 1/8" thick, I figured the angled aluminum would survive the Chicago land winter much better.
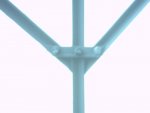
As you can see by photo (006)I began by connecting the two 28" elements to the 50" element using 1/4" nut and bolts and a fabricated bracket, this method proved to be rather sturdy.
in Photo (007) I then connected all the elements to the insulators and then to the boom using 1/4" nuts and bolts, and then connected each element with aluminum wire. In this photo you can see I had to make some changes to the 3 & 5" elements, in the drawing from TeRayCodA it shows the 3" attached to the 5" using intricate bends, with the angled aluminum I was using this was imposable, the material was just too strong, so I had to put each one on it's own insulator.
this photo also shows the entire length of the 20" boom with all the elements connected using aluminum wire, I was not sure what the element to the right of the main element is for and it's not connected to the wire, but it is connected directly to the boom without an insulator as shown in all the photos I have seen of this antenna, I was not sure if it was even needed but for argument sake I put it on. And at the very end is a 300 to 70 ohm balun.
Photo (001) shows the entire antenna put together. All in all this project cost me a total of $7.00.(the cost of a balun) The angled aluminum was from what I believe was a sliding glass door assembly, the RG6 cable was from a huge roll the cable T.V. guys gave me when they re-strung my town, the nuts and bolts I had laying around, and the rest was salvaged from an old T.V. antenna. From cutting to assembly took about 6 hours, as relatively easy.
Considering the material I used and the limited tools I had, I would say this project came out pretty well, I won't win a beauty contest with this antenna but as long as it works who cares.
One thing I was not prepared for the size, I knew this antenna was going to be 110" tip to tip, but until you see it, holy cow! this antenna up on my mast screams to the neighborhood "look at me I'm an amateur radio geek!"
I don't have any special gear to test this with, so I have to rely on comparison using the weather channels and other frequencies.
Using the stock antenna that came with my 2055, I was only able to hear clearly 2 of the 7 weather channels, using the RS 20-176, I was able to hear about 3-4 out of the 7, using the homebrew dipole found on the wiki page I am able to hear 5 sometimes 6 of the 7, using the homebrew scantenna I was only able to hear 2 of the 7, no better than the stock antenna.
So needless to say I was not impressed, I was not sure if it was the material, the construction, the changes I had to make , the weather (it's been raining out), so I put my dipole back up, and even though it is still raining, I'm back to hearing 5-6 out of the 7 weather channels, so I'm thinking weather isn't a factor.
Even though this didn't work out for me, I still had fun doing it, after all that's the name of the game, so it there is anybody out there in the Lowell, Indiana area that is interested in this behemoth PM me and I'll tell you where I'm at, and you can come and get it, minus the balun, I used it on the dipole.
The material I was going to use, 1/8" solid aluminum rods, was sent to the scrap yard before I could get it. The only choices left were either some salvaged T.V. elements, or some angled aluminum, just shy of 1/8" thick, I figured the angled aluminum would survive the Chicago land winter much better.
As you can see by photo (006)I began by connecting the two 28" elements to the 50" element using 1/4" nut and bolts and a fabricated bracket, this method proved to be rather sturdy.
in Photo (007) I then connected all the elements to the insulators and then to the boom using 1/4" nuts and bolts, and then connected each element with aluminum wire. In this photo you can see I had to make some changes to the 3 & 5" elements, in the drawing from TeRayCodA it shows the 3" attached to the 5" using intricate bends, with the angled aluminum I was using this was imposable, the material was just too strong, so I had to put each one on it's own insulator.
this photo also shows the entire length of the 20" boom with all the elements connected using aluminum wire, I was not sure what the element to the right of the main element is for and it's not connected to the wire, but it is connected directly to the boom without an insulator as shown in all the photos I have seen of this antenna, I was not sure if it was even needed but for argument sake I put it on. And at the very end is a 300 to 70 ohm balun.
Photo (001) shows the entire antenna put together. All in all this project cost me a total of $7.00.(the cost of a balun) The angled aluminum was from what I believe was a sliding glass door assembly, the RG6 cable was from a huge roll the cable T.V. guys gave me when they re-strung my town, the nuts and bolts I had laying around, and the rest was salvaged from an old T.V. antenna. From cutting to assembly took about 6 hours, as relatively easy.
Considering the material I used and the limited tools I had, I would say this project came out pretty well, I won't win a beauty contest with this antenna but as long as it works who cares.
One thing I was not prepared for the size, I knew this antenna was going to be 110" tip to tip, but until you see it, holy cow! this antenna up on my mast screams to the neighborhood "look at me I'm an amateur radio geek!"
I don't have any special gear to test this with, so I have to rely on comparison using the weather channels and other frequencies.
Using the stock antenna that came with my 2055, I was only able to hear clearly 2 of the 7 weather channels, using the RS 20-176, I was able to hear about 3-4 out of the 7, using the homebrew dipole found on the wiki page I am able to hear 5 sometimes 6 of the 7, using the homebrew scantenna I was only able to hear 2 of the 7, no better than the stock antenna.
So needless to say I was not impressed, I was not sure if it was the material, the construction, the changes I had to make , the weather (it's been raining out), so I put my dipole back up, and even though it is still raining, I'm back to hearing 5-6 out of the 7 weather channels, so I'm thinking weather isn't a factor.
Even though this didn't work out for me, I still had fun doing it, after all that's the name of the game, so it there is anybody out there in the Lowell, Indiana area that is interested in this behemoth PM me and I'll tell you where I'm at, and you can come and get it, minus the balun, I used it on the dipole.