• To anyone looking to acquire commercial radio programming software:

    Please do not make requests for copies of radio programming software which is sold (or was sold) by the manufacturer for any monetary value. All requests will be deleted and a forum infraction issued. Making a request such as this is attempting to engage in software piracy and this forum cannot be involved or associated with this activity. The same goes for any private transaction via Private Message. Even if you attempt to engage in this activity in PM's we will still enforce the forum rules. Your PM's are not private and the administration has the right to read them if there's a hint to criminal activity.

    If you are having trouble legally obtaining software please state so. We do not want any hurt feelings when your vague post is mistaken for a free request. It is YOUR responsibility to properly word your request.

    To obtain Motorola software see the Sticky in the Motorola forum.

    The various other vendors often permit their dealers to sell the software online (i.e., Kenwood). Please use Google or some other search engine to find a dealer that sells the software. Typically each series or individual radio requires its own software package. Often the Kenwood software is less than $100 so don't be a cheapskate; just purchase it.

    For M/A Com/Harris/GE, etc: there are two software packages that program all current and past radios. One package is for conventional programming and the other for trunked programming. The trunked package is in upwards of $2,500. The conventional package is more reasonable though is still several hundred dollars. The benefit is you do not need multiple versions for each radio (unlike Motorola).

    This is a large and very visible forum. We cannot jeopardize the ability to provide the RadioReference services by allowing this activity to occur. Please respect this.

Vehicle noise oddity

hanlonmi06

Member
Premium Subscriber
Joined
Jul 16, 2009
Messages
205
Location
Pittsfield Twp, Michigan
AK9R- were there obvious "sensors" that you could visually see on those lines? I have the full Chrysler service manual set with detailed wiring diagrams, I am curious now, to really confirm whether this is a thing on this truck or not. When I think of current pickup sensors, I'm thinking of some kind of CT or some such that's visible externally...more of a curiosity at this stage.

My drive this afternoon took me out of my way to pick up my son, so I had more time twiddling the vfo going down the road. Remarkable improvement on the noise floor so far.
 

mmckenna

I ♥ Ø
Joined
Jul 27, 2005
Messages
23,870
Location
Roaming the Intermountain West
If it is anything like GM or Fords, there is a hall effect sensor around the negative leads right at the battery. Looks like a big enclosed torrid with a couple of leads coming out of it.

If your truck has one, you'll see it close to which ever battery has the large connection to the chassis ground. I'd be surprised if a 2000 era vehicle had it. Really started to become popular in the 20-teens. They'll watch current consumption and (at least the modern versions) will adjust alternator output to match. That takes some load off the engine when the alternator doesn't need to be sucking energy off the pulley.
 

AK9R

Lead Wiki Manager and almost an Awesome Moderator
Super Moderator
Joined
Jul 18, 2004
Messages
9,353
Location
Central Indiana
When I think of current pickup sensors, I'm thinking of some kind of CT or some such that's visible externally...more of a curiosity at this stage.
On my 2011 F-150, there were CTs, aka "donuts", around the negative wires located about 8 inches from the battery. They were distinct devices, not just "bumps" in the wire.

In my previous life, we used zillions of Veris current switches to monitor motor status. The combo version that had both a current switch and a relay was handy for controlling and monitoring small exhaust fans. We also occasionally used the analog transducer versions. https://www.veris.com/126822/category/current-monitoring
 

hanlonmi06

Member
Premium Subscriber
Joined
Jul 16, 2009
Messages
205
Location
Pittsfield Twp, Michigan
Unfortunately not much to update. I can confirm that there is no negative lead current monitoring devices. Also, its stock headlights.....but......

...as I type this very moment, I recall installing what appear to be LED license plate lights to replace missing incandescent fixtures/bulbs!!! Ok, super motivated to look into this very thing, but I guarantee I wont get to it until way late tonight or tomorrow. I go straight from work to my son's B-Ball game. That said, in leu of knowing the exact source(s) I have been trying to "pattern" things and lately I have wondered why the morning drive seems to have different issues than the afternoon. I leave in the dark AM with lights on and head home mid day with no lights on, so, yeah....... And hey, if it takes 30 posts to have the gong go off like this, so be it.

I still need to cover the many bases offered by so many folks with bonding, "sniffer" probe antennas and cheap AM radios, because I'd really like to post up where the sources are. I think I can identify them if I just get time. Or maybe its these cheap flea-bay LED's it all along. They were installed before any radios were. To be continued...
 

hanlonmi06

Member
Premium Subscriber
Joined
Jul 16, 2009
Messages
205
Location
Pittsfield Twp, Michigan
Update:

The LED license plate lights did not appear to have any affect on the noise level. There was no real difference when unhooking them. The "patterning" also isn't panning out, but what did pan out...

Using a pocket am/fm/wx weather I was able to sniff out a couple major culprits. Keep in mind this is a dual battery, Cummins TD, no negative lead current monitoring capabilities. I tuned to static and started poking around and discovered what seemed to be tremendous noise radiating off of a negative lead that disappears down to the engine block. The Cummins has an engine control module bolted to the block on the drivers side and this likely appeared to be the power leads down to the unit. I had some snap on ferrites and decided to remove the lead from an engine bay frame ground, and put it directly to the battery. This gave slack to wrap the lead through a ferrite with one loop. The positive also lead got a few ferrites snapped on. I removed the shield of the RG8 coax/power lead to the Alinco DX70 (the radio I've been doing all this with, all along) from the negative battery lead all together. I had terminated the other end of the shield, so there is still that bonding point inside the cab (this shield is NOT the negative lead connection for the radio power, it is simply acting as a shielded conductor).

The next biggest culprit is a control module on the passenger side firewall. I listed in my notes "powertrain" and "transmission" as being both mounted in that area, so I am not sure if they are one in the same yet, but suffice to say the "alternator whine" ain't alternator wine. Its that guy...by a long shot. That bugger is very much the source of the engine speed related whine I get above 16mhz. I peeled open the loom and found what I think are the power leads and snapped a few ferrite onto those, grounds and power. I took a jumper from the battery to the engine bay frame that was sharing the grounds from this module (passenger side battery) and moved it over to a different screw about 10 inches away to try to create physical separation.

I had quite a selection of the snap on ferrite's, so I added a few on the RG8 shield at the battery connection back over on the drivers side. I did a quick course VFO dial spin just to get an idea of any changes, and there is another good notch in the bedpost on noticeable improvement's. I still hear the hash around 13-15 mhz, but the signal bars are reduced, indicating at least a reduction in the RF noise floor, the whine is much reduced but still present, so if nothing else I am confident that I am on the right set of tracks.

Original setup:
Alinco Dx70 powered from fused power in the cab, fed from the drivers side battery, Tarheel II screw driver on the bed. Virtually unusable noise floor above 10 mhz. Hood bonded to firewall frame on pass/drivers side.

Currently:
Alinco Dx70 powered from dedicated, fused, shielded positive with shield bonded at radio, DC noise filter on the positive, negative power lead using nearby vehicle ground, radio chassis bonded, ferrites on the power at the battery connection. AM BCB LPF in line out to the Tarheel II, bonding jumper added at antenna mount to the bed. Ferrites added to engine control module and powertrain/transmission control module power leads, few other ferrites sprinkled in for good luck on the various grounds under the hood. More or less usable across the 4-30mhz which is about what the TH is rated for. I don't really spin the dial much down below 4mhz.

Next steps:
Continue to monitor by using and enjoying the radio on my drives...
Made up a set of bonding jumpers, need to get them installed on bed, exhaust, ect as a matter of course
Explore ideas on shielding the module on the passenger side firewall
Research the ferrite types. Some are bonified correct composition, some are cheap online snap-on's that aren't clearly specific in their type

For anyone searching and finding this, its definitely not for the faint of heart to tackle. The posts here don't really convey the frustration and actual amount of time these few things have actually taken to accomplish. That said, none of this was terribly complicated to do, just need to be committed to keeping track of what worked, what didn't, try one thing at a time and listen to suggestions provided out there by the many folks have already done this.
 

mgolden2

Member
Joined
Oct 26, 2006
Messages
429
Location
Kansas City area
I have an 07 Dodge 1500 XLT 4x4 with a Yaesu 7800 and Motorola XPR4550 installed and I also have alternator whine on my Yaesu (or, after reading thru this post, what I always believed was alternator whine). I appreciate your efforts in tracking down and eliminating (as much as possible) the noise. Thank you!
 

slowmover

Active Member
Joined
Aug 4, 2020
Messages
1,897
Location
Fort Worth
Update:

The LED license plate lights did not appear to have any affect on the noise level. There was no real difference when unhooking them. The "patterning" also isn't panning out, but what did pan out...

Using a pocket am/fm/wx weather I was able to sniff out a couple major culprits. Keep in mind this is a dual battery, Cummins TD, no negative lead current monitoring capabilities. I tuned to static and started poking around and discovered what seemed to be tremendous noise radiating off of a negative lead that disappears down to the engine block. The Cummins has an engine control module bolted to the block on the drivers side and this likely appeared to be the power leads down to the unit. I had some snap on ferrites and decided to remove the lead from an engine bay frame ground, and put it directly to the battery. This gave slack to wrap the lead through a ferrite with one loop. The positive also lead got a few ferrites snapped on. I removed the shield of the RG8 coax/power lead to the Alinco DX70 (the radio I've been doing all this with, all along) from the negative battery lead all together. I had terminated the other end of the shield, so there is still that bonding point inside the cab (this shield is NOT the negative lead connection for the radio power, it is simply acting as a shielded conductor).

The next biggest culprit is a control module on the passenger side firewall. I listed in my notes "powertrain" and "transmission" as being both mounted in that area, so I am not sure if they are one in the same yet, but suffice to say the "alternator whine" ain't alternator wine. Its that guy...by a long shot. That bugger is very much the source of the engine speed related whine I get above 16mhz. I peeled open the loom and found what I think are the power leads and snapped a few ferrite onto those, grounds and power. I took a jumper from the battery to the engine bay frame that was sharing the grounds from this module (passenger side battery) and moved it over to a different screw about 10 inches away to try to create physical separation.

I had quite a selection of the snap on ferrite's, so I added a few on the RG8 shield at the battery connection back over on the drivers side. I did a quick course VFO dial spin just to get an idea of any changes, and there is another good notch in the bedpost on noticeable improvement's. I still hear the hash around 13-15 mhz, but the signal bars are reduced, indicating at least a reduction in the RF noise floor, the whine is much reduced but still present, so if nothing else I am confident that I am on the right set of tracks.

Original setup:
Alinco Dx70 powered from fused power in the cab, fed from the drivers side battery, Tarheel II screw driver on the bed. Virtually unusable noise floor above 10 mhz. Hood bonded to firewall frame on pass/drivers side.

Currently:
Alinco Dx70 powered from dedicated, fused, shielded positive with shield bonded at radio, DC noise filter on the positive, negative power lead using nearby vehicle ground, radio chassis bonded, ferrites on the power at the battery connection. AM BCB LPF in line out to the Tarheel II, bonding jumper added at antenna mount to the bed. Ferrites added to engine control module and powertrain/transmission control module power leads, few other ferrites sprinkled in for good luck on the various grounds under the hood. More or less usable across the 4-30mhz which is about what the TH is rated for. I don't really spin the dial much down below 4mhz.

Next steps:
Continue to monitor by using and enjoying the radio on my drives...
Made up a set of bonding jumpers, need to get them installed on bed, exhaust, ect as a matter of course
Explore ideas on shielding the module on the passenger side firewall
Research the ferrite types. Some are bonified correct composition, some are cheap online snap-on's that aren't clearly specific in their type

For anyone searching and finding this, its definitely not for the faint of heart to tackle. The posts here don't really convey the frustration and actual amount of time these few things have actually taken to accomplish. That said, none of this was terribly complicated to do, just need to be committed to keeping track of what worked, what didn't, try one thing at a time and listen to suggestions provided out there by the many folks have already done this.

An 11-Meter into a road tractor is the difficulty analog, though the exact nature of problems differ.

Everything has to go through here:
IMG_1401.jpeg


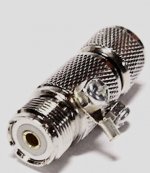
A FIRESTIK “Lightning Arrestor” is a sorta coax shield-ground recommended to try on a big truck at the transceiver when the hash drives one crazy.

I’ve used them at either end or both.
IMG_2027.jpeg

Ferrites? Fill a gallon bucket and pour slowly over the ends of each cable.


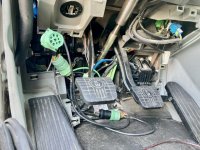
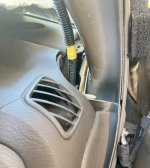
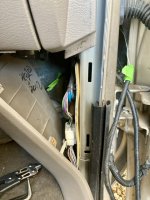
My real thought in this is the POS cable routing on my similar CTD. I ran down passenger A-pillar and then thru door electrics grommet thence between fender panels and inwards to starboard battery.

Radio Mount same area:
IMG_2010.jpeg
(Green tape used to ID for pic: on dash pass thru, on my wire shirt hanger fish-tape, and to left).
IMG_2387.jpeg
IMG_2379.jpeg

The flashlight is spotting the area from which to run the fishtape from engine compartment towards passenger front door .
IMG_2356.jpeg
 
Last edited:

madrabbitt

Member
Feed Provider
Joined
Apr 1, 2004
Messages
746
Location
NM
the one thing i saw you mention was a electrical ground (not RF ground) from the antenna's shield to bed sheet metal. You may need to get a longer strap, but try a ground strap from the same place on the antenna mount down to the frame.
 

hanlonmi06

Member
Premium Subscriber
Joined
Jul 16, 2009
Messages
205
Location
Pittsfield Twp, Michigan
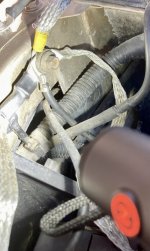
I did get to adding bonding straps from the bed and cab, to the frame. I also decided to try one of these:


31 mix, 1" ID snap on filter on the bundle on the very top of the engine that I think is the injector lines. I want to get a couple of more and try them on the bundles for that power train/trans controller on the passenger fire wall.

I will take another look at the "bonding" jumper I added on the bed mount. The passenger side strap I added from bed to frame is right there, so if I have some longer braiding still, I try that this weekend. Again, the approach has been relative reductions. I don't have real technical tools to really measure the differences, nor would I even know what to measure, but I'll say this: when driving about, I am definitely hearing everyone else's electrically noisy hash makers come and go. I get a chuckle inside my head each time.
 

slowmover

Active Member
Joined
Aug 4, 2020
Messages
1,897
Location
Fort Worth
I did get to adding bonding straps from the bed and cab, to the frame. I also decided to try one of these:


31 mix, 1" ID snap on filter on the bundle on the very top of the engine that I think is the injector lines. I want to get a couple of more and try them on the bundles for that power train/trans controller on the passenger fire wall.

I will take another look at the "bonding" jumper I added on the bed mount. The passenger side strap I added from bed to frame is right there, so if I have some longer braiding still, I try that this weekend. Again, the approach has been relative reductions. I don't have real technical tools to really measure the differences, nor would I even know what to measure, but I'll say this: when driving about, I am definitely hearing everyone else's electrically noisy hash makers come and go. I get a chuckle inside my head each time.

That’s the one I use in big truck as insurance on 12V power as the runs are so long. As many wraps of POS/NEG as possible.

.
 
Top