2018 Ford F-150 Raptor install

Status
Not open for further replies.

K7MFC

WRAA720
Premium Subscriber
Joined
Nov 18, 2017
Messages
863
Location
Phx, AZ
NICE INSTALL!!
B U T are you concerned about the 480SAT getting (literally) cooked in the sun on the dash?

Living in the desert, the interior of my truck routinely hits about 140 degrees in the summer. I've never had an issue with any of my radios under these conditions.

z8N7hQp_d.jpg
 
Last edited:

Token

Member
Joined
Jun 18, 2010
Messages
2,456
Location
Mojave Desert, California, USA
NICE INSTALL!!

B U T are you concerned about the 480SAT getting (literally) cooked in the sun on the dash? One of your photos shows the SAT head on the dash and below it the temp readout of 70° interior and 101° outside at 4:23 pm.

That was a relatively cool summer day for us.

I was a little worried at first, but so far the radio has lasted well with no issues. It has seen regular outside temps over 110 and no issues yet. The windshield and all the glass is UV blocking, and the cab, even the dash, seldom get very hot. In fact, the radio that gets hottest is the one in the overhead. The metal roof of the truck gets blazing hot, and when you open the sunglasses holder the head in there can be VERY warm until the cool air of the cab chills it.

Before this radio / head was installed in this truck it was in another vehicle for a several years. It saw the same temps, with a high of over 117 deg F during that time period. It was also on the dash for that install, although set a bit further back into the cab and probably got a bit less sun.

T!
 

Token

Member
Joined
Jun 18, 2010
Messages
2,456
Location
Mojave Desert, California, USA
I like the idea of the light bar mount for the antennas. The "indicator flag" for the antennas up/down is a great idea. I was wondering about that.

When I first did the install I did not have that indicator on there. I drove into a touchless car wash with the antennas up. Since there is about 5 inches of clearance in the car wash I snapped all three antennas off and slightly tweaked the light bar.

So something had to be done to try and prevent the same thing form happening in the future.

My first effort was a higher tech solution. I mounted an ultrasonic sensor on the light bar, angled up 45 deg and forward. I interfaced the sensor with an Arduino. I wrote the code so that anything it detected within 3 or 4 feet would lay the antenna down automatically and the manual switches were still active. It actually worked pretty well, but heavy rains, snow, or birds would lay it down also. And the obstruction had to get pretty close to trigger the lay-down, so I ended up using the switches most of the time anyway, laying the antennas down before the sensor had a chance to.

I found that the switches alone were fine, as long as I could tell visually and easily from the cab that the antennas were up or down. And so the flag was installed. At first to confirm that the sensor had layed things down, then just to remind me of the status.

T!
 

Firekite

Member
Joined
Apr 2, 2019
Messages
471
If you get a chance, it would be super cool to see a short video of them laying down and raising up.

It’s funny how often a high tech solution can be super creative and fun but in the end lose out to something simple.
 

Token

Member
Joined
Jun 18, 2010
Messages
2,456
Location
Mojave Desert, California, USA
If you get a chance, it would be super cool to see a short video of them laying down and raising up.

It’s funny how often a high tech solution can be super creative and fun but in the end lose out to something simple.

Sure thing, I'll shoot a video and upload it to my YouTube channel. May take a day or so to get it done.

T!
 

Firekite

Member
Joined
Apr 2, 2019
Messages
471
Just chiming in to say I approve of your Uniden R3 choice, but definitely make sure you get the latest 1.50 firmware on it that was released recently ;)
 

gmacka

Member
Premium Subscriber
Joined
Sep 22, 2006
Messages
125
Location
Sydney N.S.W ( south west )
OK, for some reason the server is now allowing me to post up to 5 images, per post. Not sure what is going on, but I will try to break it up into 5 or fewer images per post.


Part 1


It has been a while since I posted any of my mobile or base setups to this forum, so thought I would throw my 2018 Ford Raptor install out, if for nothing else to give people pictures of a center console shift Ford truck install.


Over the past year I have had a few different radio configurations in my 2018 Ford F-150 Raptor Supercrew. I started with a Kenwood TS480SAT for HF/6 and a Yaesu FT7900R for VHF/UHF. Then I went to a Kenwood TS2000x, with RC2000 remote head, for all bands, HF/VHF/UHF. And finally I went back to the TS480SAT for HF/6 and a Yaesu FT8900R for VHF/UHF. For all three of these configurations I also had a Uniden BCD536HP installed. The 480SAT / 8900R / 536HP is the current configuration.


The Kenwood TS2000x / RC2000 installation was the cleanest, nicest looking, install, a single radio under the back seat and a single, smaller, control head on the front dash. And I really like the ability to remote / crossband HF to UHF from the truck. However, I ended up liking the 480SAT / 8900R combination the best, as it allowed me to monitor more freqs / bands at one time and did not give me a single point of failure that could leave me with no TX.


In all three configurations the body of each ham radio was mounted under the rear seat, and the remote heads were mounted either in the pocket in the center of the dash, or in the sunglass holder in the overhead. The Uniden 536 is mounted in the closed center console, and an old Samsung Android phone is mounted on the center overhead using Siren to remote control the 536.


The antennas used for all these configurations have remained the same. A Tarheel 75A for HF, a Diamond NR770HB dual band for 2m / 70 cm, a Diamond M685S monoband for 6 meters, and a Comet CA-2x4SR for a scanner antenna.


Here is a picture of the FT8900R remote head in the overhead console sun glasses holder, with the Android remote for the 536 scanner. The sunglasses holder can be closed, leaving the radio out of sight.

Truck_radios_13b.jpg


Truck_radios_12b.jpg


The AUX switches in that image are factory equipment in the Raptor, and AUX 6 (far right) controls power for my radar detector, AUX 5 (second from right) controls power to the 536 scanner and the MFJ screw antenna controller. AUX 1 and 2 (left side) control the power lay down for my VHF and up antennas, more on that later. AUX 3 controls my on-board air compressor. AUX 4 is unused…so far.


The following pictures are the 480SAT control head on the center of the dash, and the MFJ antenna controller in a closable storage cubby in the lower center console. The mount in the dash pocket is a Built Right Industries mount, designed to fit in that location, combined with the standard Kenwood remote head mount.

Truck_radios_15b.jpg


Truck_radios_11.jpg


Picture of both radios, upper console and lower, but you can’t see the scanner controller in this picture.

Truck_radios_10b.jpg


T!
How do you go with the heat from the sun on the windscreen/dash with the remote head mounted there?
as i was thinking of doing the same in my new van
 

Token

Member
Joined
Jun 18, 2010
Messages
2,456
Location
Mojave Desert, California, USA
If you get a chance, it would be super cool to see a short video of them laying down and raising up.

It’s funny how often a high tech solution can be super creative and fun but in the end lose out to something simple.

Sorry it took a while, have been busy. Here is the video you requested. The first few seconds are still shots, the antennas move starting 16 seconds into the video.


T!
 

bharvey2

Member
Joined
Mar 12, 2014
Messages
1,985
Sorry it took a while, have been busy. Here is the video you requested. The first few seconds are still shots, the antennas move starting 16 seconds into the video.


T!


That must be what's called "radio porn".
 

Firekite

Member
Joined
Apr 2, 2019
Messages
471
Sorry it took a while, have been busy. Here is the video you requested. The first few seconds are still shots, the antennas move starting 16 seconds into the video.


T!
That’s awesome! Thank you for sharing.
 

K5MPH

Member
Joined
Jul 16, 2003
Messages
1,668
Location
Brownsville Texas,On The Border By The Sea.
Yes, my upfitters are on Aux power, ignition power. However I have a couple of them activating time delay relays so that when the ignition is turned off the power from the relays stays on for a preset time. Right now the scanner stays on for one hour after the ignition is shut off, but I can change that as needed. I have never really had an issue killing the battery, yet. Also the battery has a battery saver on it, so in theory it will disconnect before the battery dies, but so far never tested that.

Also, I don't drive anything directly from the upfitter switches, everything is via relay. Sure, a couple of the switches are 15 or 20 Amps capable, but I just don't want to test that. So I put an 8 relay box under the hood, and run everything that way. External relays were also the best way to run the light bar up/down controls.

I was not looking for a Raptor when I got this one, my wife picked it out when I was looking at other trucks. But since then it has become my, by far, favorite vehicle. It simply does everything well, good ride, on and off road, very capable, lots of creature features, etc. Parking and gas stations are the only place it comes up short, but you can't have everything. Even so, the mileage is not bad for what the vehicle is. A lifted, 6000 lb, 4x4, running 35 inch tires with 4.10 locking difs, and still can get 18 to 20 MPG on the highway if I don't drive it aggressively and I stay near legal speeds. More typically I get 14-15 or so.

Now, Ford has announced the Tremor, an F-250 set up for slow speed off road work, and that kind of fits my use a bit better. The Raptor is great, but if the ride of the Tremor turns out to be good I might have to shift over to that in 2021 or so. Also, there appears to be a well funded rumor that the Gen 2 Raptor will have an optional GT500 V8 for the last year of the model run. That could prove interesting. Of course all the other Gen 2 Raptor V8 rumors have been vaporware, so we will have to see.

T!
Is that the same one they put in the Shelby that one has almost 800 HP if so WOW.........
 

K7MFC

WRAA720
Premium Subscriber
Joined
Nov 18, 2017
Messages
863
Location
Phx, AZ
I'll believe it when I see it, but Chrysler is set to release a Hellcat powered Ram Rebel so I wouldn't be too surprised to see Ford follow suit.
 

K0wit

Newbie
Premium Subscriber
Joined
Sep 29, 2019
Messages
1
Can you please tell me about the power setup for your radios. I am interested in setting up a ic 7000 w/ auto tuner OR go simple with a Yaesu 8900. I like the simple idea just because it should be more useful for me but we are looking at a long trip to Alaska towing the raptor and I want to be sure we have commas in an emergency. . I was thinking about using the uplifted switches for power but in reading it sounds like you have a better solution. And more on the time delays as well please if you don’t mind. Sources or links of components would be helpful. TIA. K0WIT
 

wncrescue

Member
Premium Subscriber
Joined
Jul 20, 2010
Messages
85
Location
Western NC
nice setup. a couple of questions on your FT8900. What did you use to mount the head in the glasses case holder? Did you have to drop your headliner to run your remote wires to the head? Where did you get your remote microphone connector cable from? Thanks.
 

Token

Member
Joined
Jun 18, 2010
Messages
2,456
Location
Mojave Desert, California, USA
Can you please tell me about the power setup for your radios. I am interested in setting up a ic 7000 w/ auto tuner OR go simple with a Yaesu 8900. I like the simple idea just because it should be more useful for me but we are looking at a long trip to Alaska towing the raptor and I want to be sure we have commas in an emergency. . I was thinking about using the uplifted switches for power but in reading it sounds like you have a better solution. And more on the time delays as well please if you don’t mind. Sources or links of components would be helpful. TIA. K0WIT

Sources / links for most of this will be a little hard, most of the stuff came out of my junk box and was stuff I had already on hand. Some of the stuff used predates the Internet. I purchased very little specifically for this install.


The power setup for my radios (except the scanner) is pretty basic and straight forward. The scanner is a bit more complex, as that is the only radio using the time delayed relay, so I will address those two power systems separately.


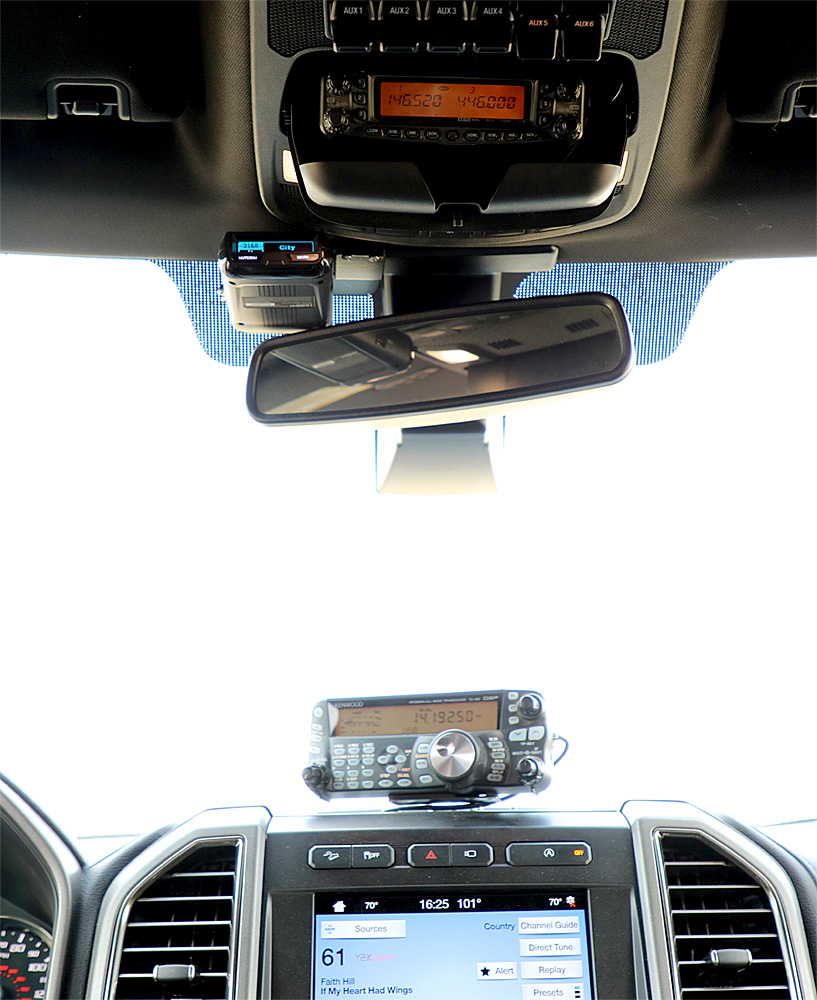
My power for the TS-480SAT and the FT-8900R comes directly from the battery to the radios under the back seat. From the battery posts I run 4 gauge wire to a fuse holder / terminal board near the passenger side firewall. This terminal board is hot all the time. The 4 gauge wire has a blade type fuse right at the battery posts protecting this entire run.


From this always on terminal board I run another set of fused 4 gauge wire across the firewall (in flex) to the factory rubber pass through near the steering column. I drilled a small hole in this pass through and run the 4 gauge inside the cab there. There is a rubber nipple on both the inside and outside of this pass through that is perfect for this type of thing, and well to the side of the existing wires. A bit hard to reach, but works extremely well. Because the hole drilled is smaller than the wire it is an intentionally tight fit, and very water resistant.


The power wires then go from the inside of the firewall right over to the kick panel that is beside the drivers left foot. Behind the kick panel and under the door jams there is a set of plastic wire trays running all the way back to the back seat, the wire is laid and tie wrapped into that. The wire comes out behind the back seat, where I have another terminal board that breaks it out to each radio (the TS-480SAT and the FT-8900R). Each radio is also individually fused (both hot and ground sides) coming off this terminal board.


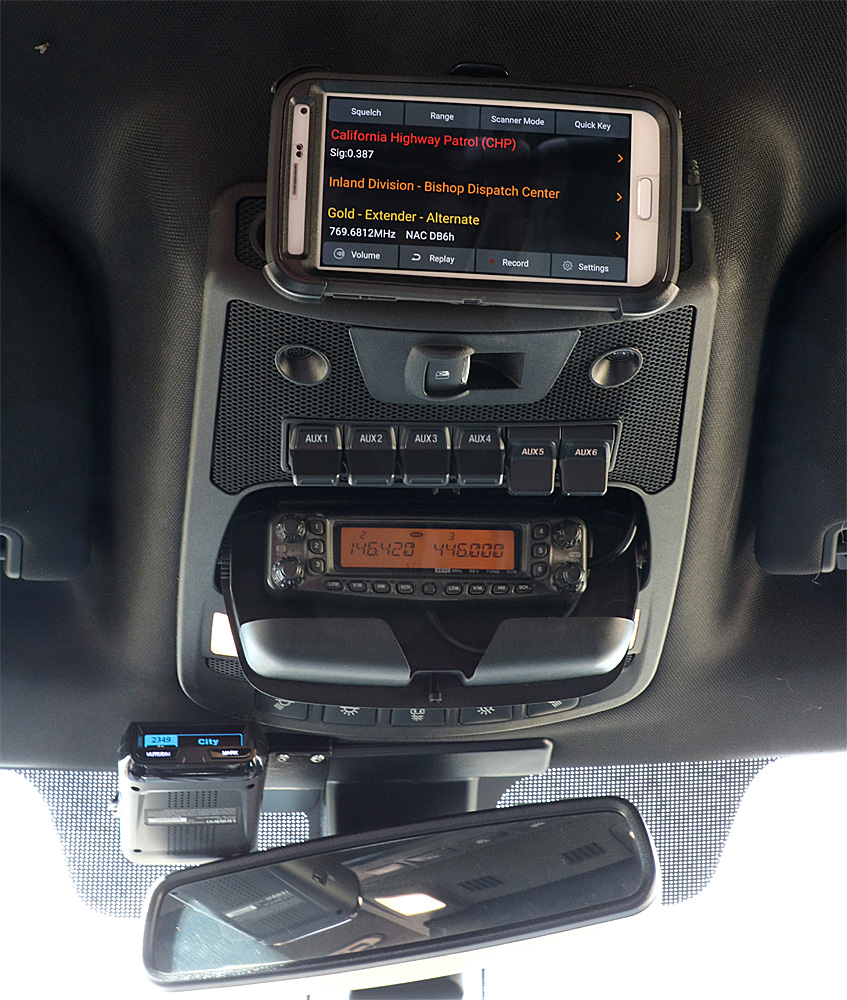
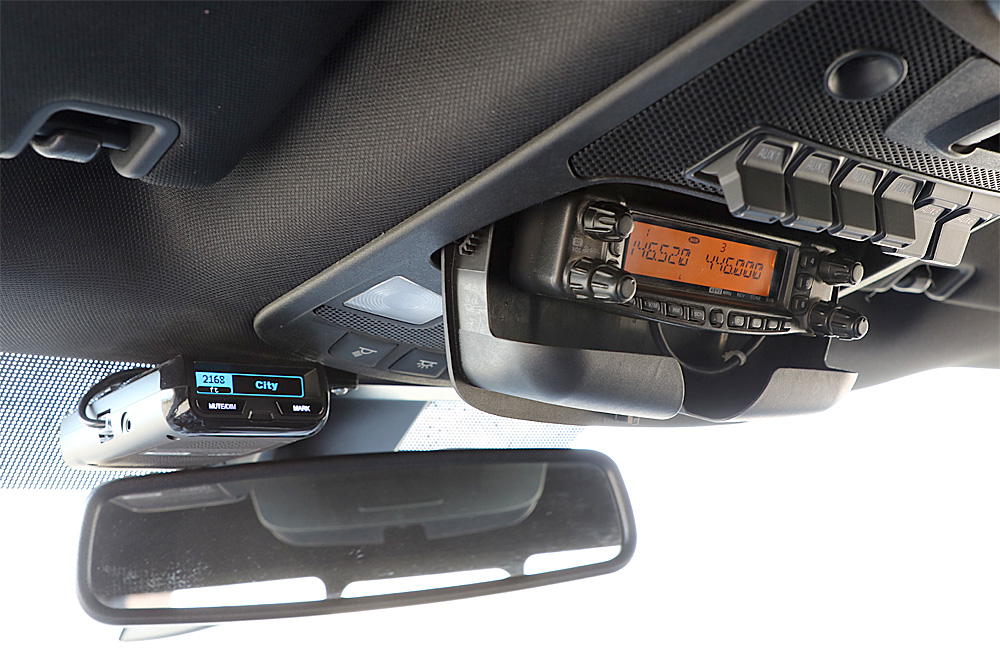
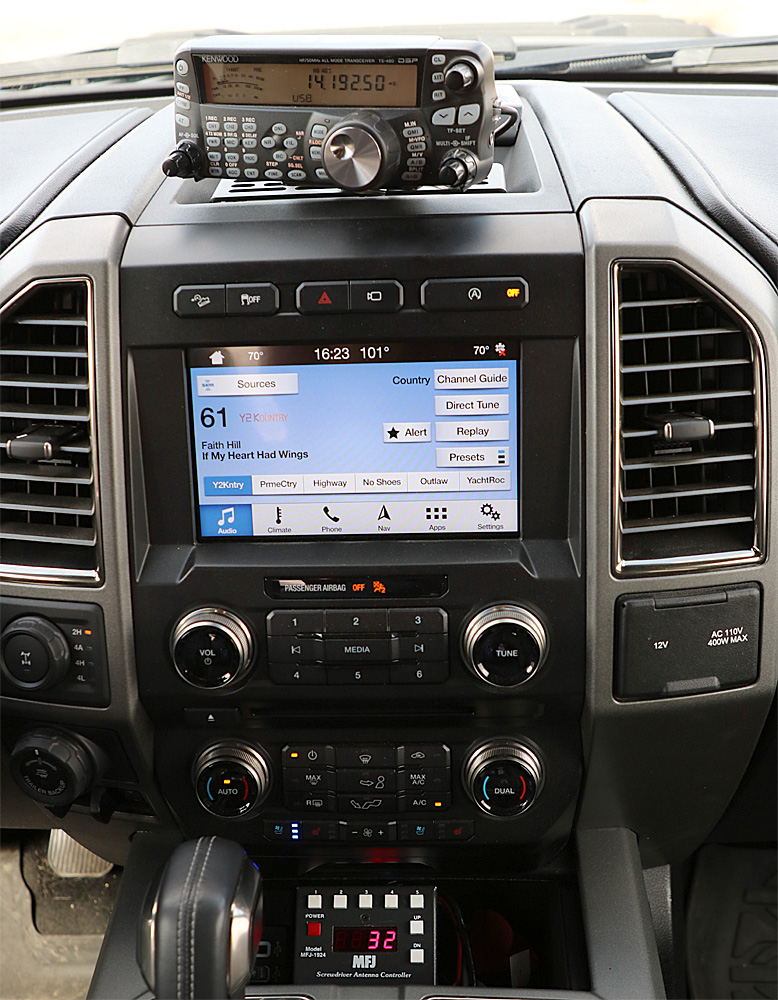
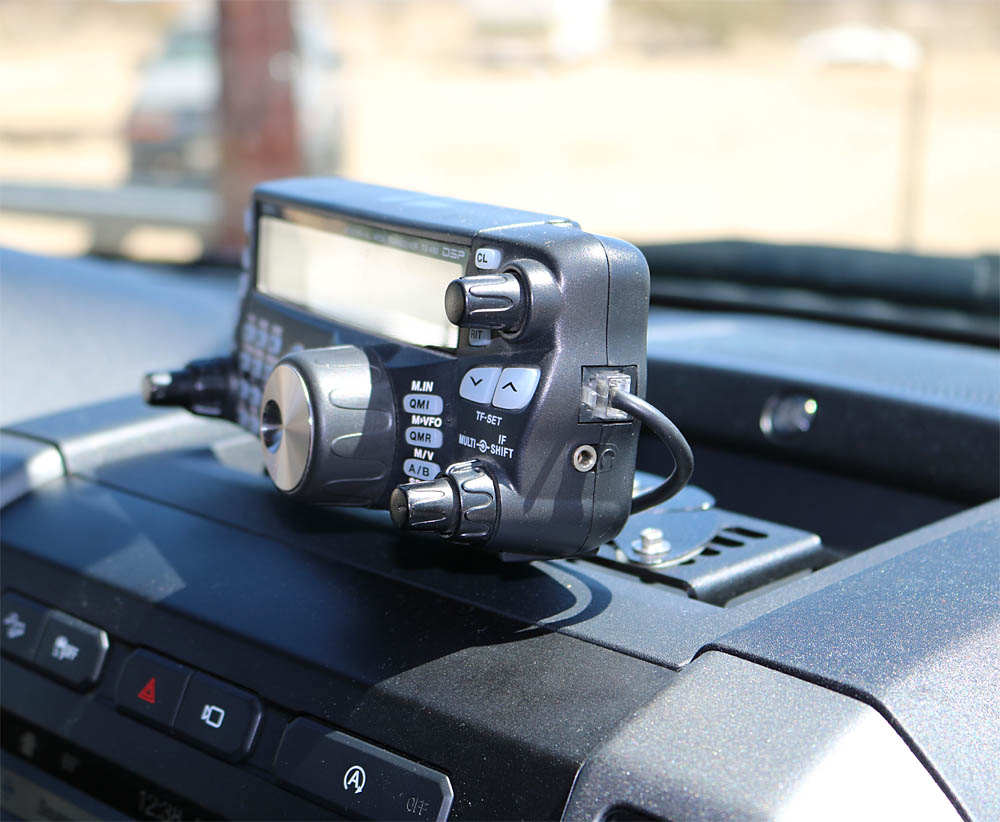
So the TS-480SAT and the FT-8900R are always hot, and can be left on, on purpose or by accident, with the vehicle turned off. Since the TS-480 is on the dash I have never accidentally left that one turned on. However, the FT-8900R has been left on several times by accident. This especially happens if I have closed the sunglasses holder for some reason after turning the radio on. To date this has not killed the battery, but I did leave it turned on for an entire weekend once.


I power almost nothing directly from the Upfitter switches. My truck is a 2018 (but I think this applies to 2017 to 2019 trucks) and the upfitter switches are fused / rated at 15 Amps (AUX 1 and 2), 10 Amps (AUX 3 and 4), and 5 Amps (AUX 5 and 6). However, in my opinion the wire used for them is too small for those ratings, particularly AUX 1 and 2. AUX 1 and 2 are 17 ga wire, AUX 3 and 4 are 20 ga, and AUX 5 and 6 are 22 ga. So for anything more than a couple of amps I use the AUX switches to drive relays wired with larger wire. The exception to that is my AUX 6 use, that drives my radar detector and that is a pretty small load, so I use just the AUX switch and the factory provided firewall pass through wires.


AUX 1, via relays, drives the antenna lay down in the down direction, AUX 2, via relays, drives the antenna lay down in the up direct, they are fail safed by design so accidentally turning both on will drive the antenna down but do no harm. AUX 3, via relays, runs the on-board air compressor. AUX 4, via relay, is used to kill the scanner right now, overriding the off time delay system (this is a recent addition). AUX 5, with a time delay timer / relay, runs the scanner and screwdriver HF antenna control. AUX 6 is direct connected to the radar detector.


To house all relays, except the time delay timer, I did purchase a relay box and install it under the hood, on the drivers side inner fender. The box used was similar to this https://www.amazon.com/ONLINE-LED-STORE-12-Slot-Installation/dp/B072KJNPHJ/ and I used Bosch relays. I think you can buy the same thing with relays and fuses included, but I already had the relays / fuses and only needed the box.


For the delayed relay stuff I used an off delay timer, similar to (but not the same thing, the model I used is older and no longer sold) this Qianson DC 5V 12V 24V Digital LED Display Infinite Cycle Delay Timer Switch ON/OFF Relay Module (DC 12V) - - Amazon.com However, if I was buying new today I would be tempted to try this 10 Amp Mini Timer Time Delay Relay .2 Sec to 400 days 6V 12V 18V. Power On Off Delay, Cycling and Trigger - - Amazon.com

That timer powers (its “load”) a standard relay controlling the always on power from the same firewall mounted terminal board that powers the TS-480 and FT-8900R.


Works like this, when AUX 5 switch is powered on (either turning it on or turning on the truck if AUX 5 is left on) the switched AUX 5 power is applied to the trigger of the delay timer, causing it to close its internal relay. This applies power to the coil of a standard automotive relay, providing unswitched (always on) power to the scanner. It makes the unswitched power now switched / controlled by the off delay timer via the AUX 5 switch. When I shut AUX 5 off, or when I turn off the truck, the trigger is removed, and the off delay timer shuts off its internal relay, killing the standard relay, after the programmed time, currently one hour. So turn off the truck or turn off AUX 5 and one hour later the scanner shuts off.


I added the ability to override and kill the timer using AUX 4. Sometimes you just want to kill the scanner right now, say driving in the gate to a military installation or something. I could, of course, open the center console and turn the radio off with the front panel control, but I wanted a quicker way.


So AUX 4 runs another standard automotive relay, and the “always on” power source to the off delay timer is run through the NC contacts of that relay. As long as AUX 4 is off then the off delay and AUX 5 can do their jobs. But turn AUX 4 on and it kills the power to the delay timer, turning off the scanner right now.

T!
 

Token

Member
Joined
Jun 18, 2010
Messages
2,456
Location
Mojave Desert, California, USA
nice setup. a couple of questions on your FT8900. What did you use to mount the head in the glasses case holder? Did you have to drop your headliner to run your remote wires to the head? Where did you get your remote microphone connector cable from? Thanks.
To mount the head in the glasses holder I removed the rubber pocket that is in there from the factory, it is there to reduce vibration noise and just comes right out. Then I used 3M double sided dense foam mounting tape on the back of the head, and pressed it in place. So far it has held up well, although I originally used a different type of tape, and it softened up in the heat, allowing the head to sag.


I did not have to drop the headliner.


I removed the inner A pillar trim and removed the overhead console. The overhead console took serious effort because the clips are very stout and I was afraid I was going to break something I was applying so much force, but it snapped out just fine, and more importantly snapped back in snug and secure. I could then use a stiff piece of wire to snake over from the overhead to the top of where the A pillar trim would be, attach the control head and mic wires to that snake, and pull them through.


Then down the A pillar, paying attention to where and how the air bag would deploy and making sure the radio cables were behind that system, not crossing it. At the bottom of the pillar I could feed the cables down the side of the dash, inside the whole way. Then down behind the passenger kick panel. The microphone cable went across under the dash to the center console, back along the inside of the center console, to the storage area in the console. The head control cable went under the splash plates / door jams back to behind the rear seat, then over to the radio.


The cables are completely above the liner / behind panels / under carpet the entire way until you get to the back seat, then behind the seat they are above carpet. I could snake them under the carpet there easily, but I have no issue with where they are now.


I don’t remember where I got the microphone extension cable, it is a 20 footer I have had a few years now and used it in the last vehicle this FT8900R was mounted in. However, isn’t it just a standard 6P6C RJ-12 cable? I think I used a RJ-12 female / female extension coupler at the far (microphone) end to couple the mic to the extension cable. I know the head cable is unique, but I think the mic is just an RJ-12/11. However I think Yaesu does make a specific extension for the mic, the MEK-2 extension kit. Seems like it is only 10 feet long though, and pretty expensive, mostly because of the (unneeded for this application) multi mic connector termination.

T!
 
Status
Not open for further replies.
Top