2014 GMC Sierra 1500 Custom Console

Status
Not open for further replies.

rki616

Member
Joined
Mar 24, 2010
Messages
56
Location
Kent County, MI
Hi! Any updates? Would love to see the finished product. I just bought a 2014 silverado which is very close to what you have.
 

Netopalis

Member
Joined
Aug 29, 2006
Messages
10
Update?

Hey, I love this thread! I just got a 2014 Silverado 1500 as well, so I'd love to hear how this ended up??
 

KA1E

Member
Joined
May 16, 2014
Messages
4
Location
Mass
I have a new 2014 Silverado CC with a semi hard bed cover and there were some great ideas here to get me started. I ended up getting a SH4UHF mount for my ham rig with a ATAS-120a antenna. Ran the wire down the stake hole and under the rear side door. (don't want to drill any holes). I had to make a new clamp for the inside because the rubber that cam with it wouldn't compress enough to grab the stake hold. I just got a stiff bar with threads to match the attachment bolt that came with it.
I'm getting a similar one to use for my CB on the other side of the truck. SH42 I believe. My Wilson 5000 should screw right into the stud mount. Not sure that one will work because it may not extend out far enough so the cable does not hit the paint. Now to figure out where to connect a separate circuit to the battery and how to get it into the center console area. I believe amp makes a circuit breaker to use at the battery to protect the wires.
 

KA1E

Member
Joined
May 16, 2014
Messages
4
Location
Mass
Got this setup - it has everything for lots of aux power except the battery and a rubber grommet to get the wire into the cab! Total about $250 with shipping (plus a AGM battery)

BS7611 Blue Sea 7611 DC BatteryLink Automatic Charging Relay 120 Amp $79.99 1 $79.99
CB285-50 Resettable Circuit Breaker Cooper Bussmann (Amps: 50) $28.99 1 $28.99
Wire-RB-10-25 Red/Black Zip Cord (Gauge: 10, Length: 25 ft.) $34.34 1 $34.34
PS-6AA PS-6AA - Red-Dee-2 In Line 6-Way Powerpole Splitter $34.99 1 $34.99
WP45-10 45 Amp Permanently Bonded Red/Black Anderson Powerpoles (Sets: 10) $16.99 1 $16.99
TRIcrimp TRIcrimp, the ideal Powerpole Crimping Tool for 15, 30 and 45 amp contacts $39.99 1 $39.99
 

avgas

Member
Joined
Nov 25, 2007
Messages
162
Location
Alberta
NMO Mount

Here is an NMO mount in the roof of my 2014 GMC Sierra SLT crew cab. I didnt remove the headliner, I just drilled the hole and used a wire to fish the coax from the hole over to the top edge of the real door and down the corner of the cab behind the trim.
 

Attachments

  • 2014 nmo.jpg
    2014 nmo.jpg
    51 KB · Views: 1,504
  • 2014nmo1.jpg
    2014nmo1.jpg
    30.1 KB · Views: 1,402
  • 2014nmo2.jpg
    2014nmo2.jpg
    31.3 KB · Views: 1,410

Sharkbait08

Member
Joined
Apr 21, 2013
Messages
33
Location
Kodiak, AK
Long overdue updates...

Sorry everyone, I got relocated to a new job in Alaska, and have had a really busy couple of years so I never got around to posting the rest of the build and install. Better late than never I guess...

So the next step was to cut the radio openings, bending the sides as mounting tabs for the radios. I clamped the faceplate to a piece of 1/4" bar stock to use as a bending mold to help hold the shape while I bent the tabs.


Here you can see the tabs bent out for the Cobra CB.


This handmade process required a lot of fitting, checking, refitting, checking and so on...


Next I rounded the sharp corners and edges, then fit the radio.


N8OHU

Member
Joined
Jun 9, 2012
Messages
620
That's okay; the real world has a habit of doing that sometimes. Nice to see you made it back to update us.

Sent from my XT1080 using Tapatalk
 

Sharkbait08

Member
Joined
Apr 21, 2013
Messages
33
Location
Kodiak, AK
Forgot to mention in the first update that all of this was done back before my job changed, so all of these pics/build notes have several years of dust on them... Also, I apparently never put the photos in photo bucket, so that took a min to get moving on the posts again.


Next was to tap/install the other side arch. Again, everything was drilled by hand and hand tapped.


Then I cut the calculated angles into the bottom of the front brackets so I could build and mount the bottom structure.


Kinda went on autopilot at this point and didn't take very many photos in that process. Hard to stop with the welder for photos. The upper cross braces were welded in so that they didn't interfere with either radio. The top brace had to be cut down (about halfway) to clear the CB. All of the welds were ground smooth so the faceplate would mount flat.


I premounted the small fuse block, terminal board, and ChargeGuard to some flat stock I used as the bottom cross braces. They are mounted using either the same 8-40 screws, or self-tapping sheet metal screws for the ChargeGuard. The ChargeGuard allows you to run power cables straight from the battery, but operates as an intelligent switch/relay to power your equipment. When it senses AC current on the battery, i.e. your alternator's charge current, it closes the relay and turns your equipment on. At the time, I didn't know about the retained accessory power that was available under the dash on my 2014. But the charge guard has worked great for the past 3 years. You can also set it to run for a set time period after the engine turns off. I have it programmed to stay on for 15 minutes after the engine is shut off.
 

Sharkbait08

Member
Joined
Apr 21, 2013
Messages
33
Location
Kodiak, AK


Then I got the Vertex VX-2200 tabs cut and mounted the radio to make sure everything cleared the bottom of the radio.


I wanted a ignition switched 12V outlet, so I decided to wire one into my mini-console. Hindsight being 20/20, I could have just switched the fuse in my dash from outlet 10 to 11, and the dash 12V outlet would be on that retained accessory power instead of constant 12V... Oh well, now I have two... :D And yes, that's a West Marine 12V outlet. Only one I could find with the mounting face that worked for my layout.


After mounting the bottom sheet metal, I prewired as much as I could. Each radio has its own fuse, as does the 12V outlet. Had some extra fuse slots left over for future upgrades that haven't happened yet.
 

Sharkbait08

Member
Joined
Apr 21, 2013
Messages
33
Location
Kodiak, AK

Now that everything was mounted and all my wires fabricated, I blew it all apart for paint. Rattle can black was the simple solution for that.


Once painted, everything was reinstalled onto the baseplate and wires reinstalled.


At this point I discovered that my 12V plug just barely didn't clear the VX-2200 on the bottom. A dremel sanding drum solved that issue pretty quickly.


Trying to make this console as compact as possible, there were a lot of clearance issues. The VX-2200 is almost touching the ChargeGuard, but it all fits. I also grounded the entire frame to the ground terminal block, which is also grounded to the truck's frame behind the dash.


Side view as it was being reassembled after paint.
 

Sharkbait08

Member
Joined
Apr 21, 2013
Messages
33
Location
Kodiak, AK

Next I had to clearance the top/back sheetmetal to clear the radios, allow the antennas to connect, and run the wires through. I used a punch at my marked locations to keep the step drill bit from slipping.


Because of how tight I fit everything, a 90 degree PL-259 adapter was necessary. One of the holes on the back metal was to clear this adapter (orientation was changed to run straight down).


Side view of everything installed with top metal on.
 

Sharkbait08

Member
Joined
Apr 21, 2013
Messages
33
Location
Kodiak, AK
Some of you will have noticed by now that the interior isn't black. I hit the interior with a dark grey/green primer I had laying around. This was to protect the steel from rust, and to help if I had to pop it open to work on anything, the black plastic and wires would stand out a little better.


Close up of the back plate. On the outer two holes I installed rubber grommets to protect the wires from sharp edges. One was for antenna cables, the other for power cables. Trying to minimize interference as much as possible.


Front/side view. The radio slots aren't quite perfect, but that's part of the beauty of a DIY build. They fit well enough for me, and as it sits in the truck you can't see the gaps anyway.


Side/back view. The power cables were some 6 or 8 gauge cable I grabbed for the project. Can't quite remember which.
 

Sharkbait08

Member
Joined
Apr 21, 2013
Messages
33
Location
Kodiak, AK
Into the Truck


Now it was time to install in the truck. I pulled the side plate to run the antenna cables which were already installed earlier.


At the top right you can see where the antenna cables come into the box. They just barely cleared the back of the Cobra CB. If I did this project again, I'd leave a bit more space, but it all worked out in the end.


Closed up and slid into position. I didn't take photos, but I used some extra 1/2" angle iron I had to build a bar bracket to secure the box to the truck. Basically it runs straight back from the rear driver side corner to a metal support for the dash. Drilled and tapped on the dash side, utilized existing holes on the mini-console's left side. Mini-console is very secure, but could easily be removed if I needed access to the interior for upgrades/additions, or even eventual removal if I add a quick disconnect feature for the power/antenna cables.


Front view. Again, didn't take photos of the power cable install. It runs straight from the battery on the passenger side of the engine compartment, through a 30A master fuse mounted in the engine compartment, into the cab using the same grommet as the NMO mount cable, except on the passenger side. Ground cable was connected to a frame stud under the dash.
 

Sharkbait08

Member
Joined
Apr 21, 2013
Messages
33
Location
Kodiak, AK
After the install, I used a jumper to connect my SWR meter (not an easy feat with as little clearance as I have for antenna cables) and tuned in both my CB antennas. SWR for the 4ft firefly was superb, the meter barely even moved above 1.1 over all 40 channels. The 2ft version was a little less cooperative. Eventually I got it down to about 1.3 on Ch 19, and around 2.0 or 2.2 on Ch's 1 and 40. Definitely good enough for my expected use monitoring traffic while commuting.

I think the permanent install with a solid ground helped out over the temp wiring through the 12V plug. Some of you antenna guru's might have some better insight into that.

Anyways, with the 2ft antenna tuned in far better than before, that's the antenna I've run pretty much all of the last 3 years. Don't have to worry about hitting it on drive throughs, parking garages, or anything else. It got decent reception for traffic updates driving I-10 everyday in New Orleans, and suits my current needs in Kodiak, AK of just monitoring local channels (mostly quiet anyways). When the wife and I road trip across the states during our move back from Kodiak later this year, I might switch back to the bigger antenna. But not having to drop the 2ft when hitting a drive through for food sure is convenient on long road trips. The 4ft might clear, I'll have to measure that.

I'll head out to the truck in a bit to get some 3 years later pics for y'all to see.
 

Sharkbait08

Member
Joined
Apr 21, 2013
Messages
33
Location
Kodiak, AK
973e344af6fbf7b2c68ffdc1ff9f6874.jpg

View from the driver's seat. Radios are at enough of an angle that I can read the channel when the VX-2200 stops scanning and picks something up. CB is really easy to read.

af909813b49a3a894d2571539cec2323.jpg


f70156496f777324d349f00cbcc99ec6.jpg

I put a black plastic stick on mic holder on the dash for easy reach. This is usually reserved for the CB unless I'm having a conversation on the VX-2200. Looks pretty good in my opinion.

26d72c1d1e02589acec35294ce21f495.jpg

Driver side view, since I mostly show the other side everywhere else.

3fbdce630622650c162a788cfe4ae7d1.jpg

I have my VX-2200 programmed to enter a scan mode when the mic is grounded. Using a metal mic hanger on the grounded frame accomplished this, while keeping the other mic handy but out of the way. The radio will scan the current group until I pick up the mic or place it in the plastic holder.

5abd0f43e9ae2264f9311efabc302985.jpg

And here is the mounting bracket I created. Simple, yet effective. Pull two screws and the whole unit is free, except for the wires. Never got around to doing the quick disconnect on the wires and cables.


Sent from my iPhone using Tapatalk
 

Sharkbait08

Member
Joined
Apr 21, 2013
Messages
33
Location
Kodiak, AK
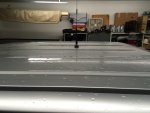
Sorry for the grainy cell phone photos. The little black box on the top of the console is a control unit for a pair of amber LED's I added to the rear window. Having to drive the ALCAN during my transfer to Alaska, and knowing the winters up here, I wanted some extra warning power out the back in case of whiteout conditions. They easily went into one of my extra fuse slots, but thankfully I only needed them once when I slid off an icy road up in Kodiak.

Overall, I'm still really happy with my choice to build it myself instead of a much bigger console. Haven't had a need to change any of it since I installed it 3 years ago, other than adding the amber lights. My GPS and dash camera run off the 12V outlet, but the dash cam will be hard wired to the retained accy power shortly now that I know about it. The setup worked really well during my massive 5200 mile road trip from New Orleans to Kodiak, AK right after it was installed. Doesn't take up too much room, I can read/hear the radios, and other than my wife turning them down when locals get chatty on GMRS, I haven't had any complaints from her on it.

If you're thinking of doing something similar yourself, I did learn a few lessons.

First off, make sure you have room for wires and connectors, not just physical radio sizes. I got lucky with my planning, but it was tight. I wanted to make this as small as physically possible, and I succeeded, but there isn't much room for tinkering, upgrading, or anything else for that matter.

Second, when working with the sheet metal, wear gloves, and file/grind all your edges. This thing was sharp until I knocked down the edges post-install.

Third, aside from welding my frame, this could really be accomplished by virtually anyone with basic tools. And you could easily solve that with a tube of JB Weld, or come up with a bolt-fit structure design that doesn't need welding. Plan it out, double check fits constantly, and take your time. The most complicated part is planning out how you'll accomplish all of your goals and fit everything with the minimal amount of wasted space.

My finished product may not be as "clean" as a commercially available product, but it is ideally suited to my individual needs. I was able to minimize the loss of useable cab space, kept all my stock dash features (mini-dashbox, 12V outlet, and 110V inverter plug), and fit both radios. Hoping my next project will be finishing the rewiring of my CJ5 so I can wire in my intercom and radios, but first I have to get back to the lower 48 and get the Jeep back from storage (later this summer maybe?).
 
Status
Not open for further replies.
Top