• To anyone looking to acquire commercial radio programming software:

    Please do not make requests for copies of radio programming software which is sold (or was sold) by the manufacturer for any monetary value. All requests will be deleted and a forum infraction issued. Making a request such as this is attempting to engage in software piracy and this forum cannot be involved or associated with this activity. The same goes for any private transaction via Private Message. Even if you attempt to engage in this activity in PM's we will still enforce the forum rules. Your PM's are not private and the administration has the right to read them if there's a hint to criminal activity.

    If you are having trouble legally obtaining software please state so. We do not want any hurt feelings when your vague post is mistaken for a free request. It is YOUR responsibility to properly word your request.

    To obtain Motorola software see the Sticky in the Motorola forum.

    The various other vendors often permit their dealers to sell the software online (i.e., Kenwood). Please use Google or some other search engine to find a dealer that sells the software. Typically each series or individual radio requires its own software package. Often the Kenwood software is less than $100 so don't be a cheapskate; just purchase it.

    For M/A Com/Harris/GE, etc: there are two software packages that program all current and past radios. One package is for conventional programming and the other for trunked programming. The trunked package is in upwards of $2,500. The conventional package is more reasonable though is still several hundred dollars. The benefit is you do not need multiple versions for each radio (unlike Motorola).

    This is a large and very visible forum. We cannot jeopardize the ability to provide the RadioReference services by allowing this activity to occur. Please respect this.

Connection to car battery

Peter1154

Member
Joined
Jul 31, 2024
Messages
7
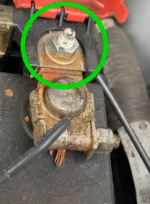
Hi folks, finally getting to installing my first mobile. Question is how do you physically connect the power wires from your radio to the battery? Josh over at HRCC showed this in one of his videos, but it seems a little sketchy to me. I know to include in-line fuses and connect the negative to the chassis ground, but what connector do you recommend? Thanks.

1737252470412.png
 

ofd8001

Member
Premium Subscriber
Joined
Feb 6, 2004
Messages
8,089
Location
Louisville, KY
Well... I would not recommend the example shown in the photo.

Black wires are commonly accepted as ground or negative wires.

If you can find a nut that would thread on the terminal of "thing" circled in green, then a properly size eyelet solderless connector would be my suggestion. I'd probably use an ATC fuse connector next. Followed by a wire to the power side of the radio. Be sure you consult charts you can find on-line to ensure the fuse matches the wire amperage, or even go one wire size larger.
 

Peter1154

Member
Joined
Jul 31, 2024
Messages
7
Well... I would not recommend the example shown in the photo.

Black wires are commonly accepted as ground or negative wires.

If you can find a nut that would thread on the terminal of "thing" circled in green, then a properly size eyelet solderless connector would be my suggestion. I'd probably use an ATC fuse connector next. Followed by a wire to the power side of the radio. Be sure you consult charts you can find on-line to ensure the fuse matches the wire amperage, or even go one wire size larger.
Figured as much. Are solderless connectors the ones you have to crimp? I'm a new ham so I'd appreciate any tool recommendations to that end. Thanks for the reply.
 

prcguy

Member
Premium Subscriber
Joined
Jun 30, 2006
Messages
16,706
Location
So Cal - Richardson, TX - Tewksbury, MA
The example in the picture would make a good "what not to do video". In addition to what's been said you should fuse the wire near the battery before it passes through the firewall. You can go big on that fuse or circuit breaker like 50A or more as its not really for the radio, its to protect from burning your car up incase of a short. A higher amperage fuse than the radio needs will have less voltage drop to the radio.

You might also consider upsizing the wire and installing a small power distribution block in the passenger area for future radios or electronics.
 

Peter1154

Member
Joined
Jul 31, 2024
Messages
7
Okay seems like I have some more work to do before installing then. In that case, is there any way to test my radio before installing it? I bought it used and wouldn’t mind getting a contact just to make sure it works. Don’t have a power supply. Thanks again.
 

Chris155

Member
Joined
Nov 21, 2024
Messages
20
Location
Southern Maryland
Hi folks, finally getting to installing my first mobile. Question is how do you physically connect the power wires from your radio to the battery? Josh over at HRCC showed this in one of his videos, but it seems a little sketchy to me. I know to include in-line fuses and connect the negative to the chassis ground, but what connector do you recommend? Thanks.

View attachment 176581
Use a crimp & heat shrink ring terminal to connect to your circled stud. That stud is usually 6x1.0 or 8x1.25 thread. I’d try to add a nut on top to hold the radio power wire. If there not enough thread it’s completely acceptable to use the existing nut. Make sure your crimps are done with proper tools, wire and fuse sizes match and keep your wires away from pedals, steering, exhaust ect. That wire jammed in the battery post is not what you want.
 

mmckenna

I ♥ Ø
Joined
Jul 27, 2005
Messages
25,598
Location
United States
Couple of things I'd add:

Don't buy the cheapest crimp terminals you can find. The cheap ones have a very thin tin coating that will come off and you'll get corrosion. Get some good name brand crimp connectors that are:
-Ring terminal the correct size to fit over that stud.
-Correct size for the wire gauge.
This is important if you want a good low resistance connection (and you do….)

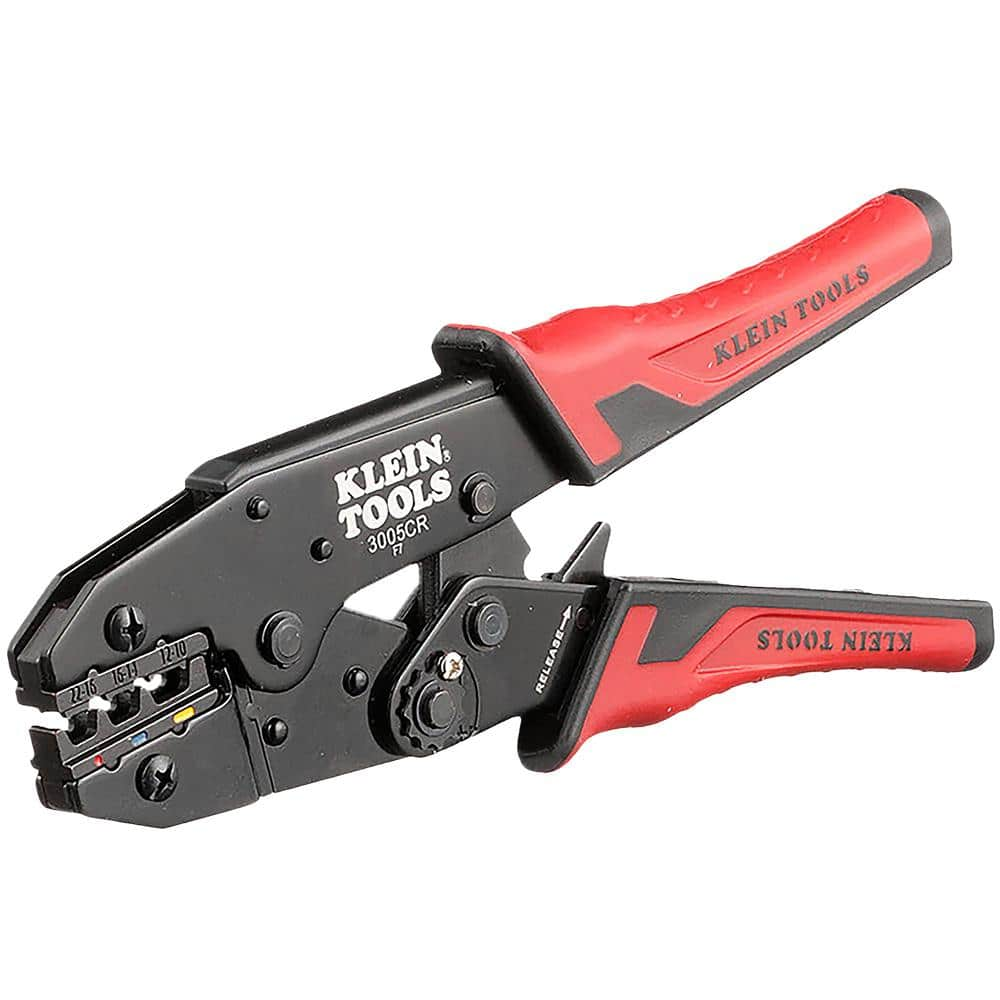
Get the right crimpers. With respect to Chris above, do -not- buy those kind. They usually do a poor job of crimping. Go to Home Depot and purchase these:
Those are a 'full cycle' tool. They'll do a nice wide crimp on the terminal, and the handles will not release until it's been fully cycled. They cost a few more bucks than the ones posted above, but it's worth every additional cent. I've been using different variations of those for about 30 years now and never had a crimp fail.

Following up with some marine grade heat shrink tubing isn't a bad idea. Make sure it's the marine grade stuff. It has a hot melt adhesive on the inside that will flow when heated and seal the connection. It keeps water out and acts as a strain relief.

If you upsize your conductors, as the green one said above, you'll need to make sure you have the right size terminals and crimpers to do it right.

For your negative, ground it close to the radio.
 

mmckenna

I ♥ Ø
Joined
Jul 27, 2005
Messages
25,598
Location
United States
Can you clarify this? I've heard to just ground it at the chassis ground next to the battery.
Thanks.

For low amperage draws like your radio, running negative all the way back to the point where the battery negative attaches to the chassis ground isn't necessary. The body of the vehicle is ground, and you can hop on that for the return trip. No reason to run extra wire. The shorter negative lead, which will be grounded to the radio chassis, will give a nice drain for RFI to the body.
 

ofd8001

Member
Premium Subscriber
Joined
Feb 6, 2004
Messages
8,089
Location
Louisville, KY
Here is a link to an automotive wire chart: Automotive Wire Amperage Capacity Chart

In addition to what's been said you should fuse the wire near the battery before it passes through the firewall. You can go big on that fuse or circuit breaker like 50A or more as its not really for the radio, its to protect from burning your car up incase of a short. A higher amperage fuse than the radio needs will have less voltage drop to the radio.

You might also consider upsizing the wire and installing a small power distribution block in the passenger area for future radios or electronics.

I disagree. The size of the fuse/circuit breaker at/close to the battery, needs to match the current carrying capacity of the wire. If you use a 50 Amp fuse on something like 16 gauge wire, the wire will fail before the fuse. When wire fails it comes with smoke and flames.

You should have a second fuse, somewhere close to the device, that corresponds to the device manufacturer's recommendations.
 

prcguy

Member
Premium Subscriber
Joined
Jun 30, 2006
Messages
16,706
Location
So Cal - Richardson, TX - Tewksbury, MA
Here is a link to an automotive wire chart: Automotive Wire Amperage Capacity Chart


I disagree. The size of the fuse/circuit breaker at/close to the battery, needs to match the current carrying capacity of the wire. If you use a 50 Amp fuse on something like 16 gauge wire, the wire will fail before the fuse. When wire fails it comes with smoke and flames.

You should have a second fuse, somewhere close to the device, that corresponds to the device manufacturer's recommendations.
Of course, the wire and fuse size should be compatible. I often run 4ga with 100A fuse at the battery to a distribution block in the cab.
 

mmckenna

I ♥ Ø
Joined
Jul 27, 2005
Messages
25,598
Location
United States
Josh over at HRCC showed this in one of his videos, but it seems a little sketchy to me.

I watched his F150 install video.
It's the type of install I'd expect from an amateur radio operator.
I don't mean that as an insult. Just saying that the install was the absolute bare minimum with a few things that were red flag worthy. I would be very cautious using Youtube, and his video, as guidance for doing a radio installation.
 

Chris155

Member
Joined
Nov 21, 2024
Messages
20
Location
Southern Maryland
Couple of things I'd add:

Don't buy the cheapest crimp terminals you can find. The cheap ones have a very thin tin coating that will come off and you'll get corrosion. Get some good name brand crimp connectors that are:
-Ring terminal the correct size to fit over that stud.
-Correct size for the wire gauge.
This is important if you want a good low resistance connection (and you do….)

Get the right crimpers. With respect to Chris above, do -not- buy those kind. They usually do a poor job of crimping. Go to Home Depot and purchase these:
Those are a 'full cycle' tool. They'll do a nice wide crimp on the terminal, and the handles will not release until it's been fully cycled. They cost a few more bucks than the ones posted above, but it's worth every additional cent. I've been using different variations of those for about 30 years now and never had a crimp fail.

Following up with some marine grade heat shrink tubing isn't a bad idea. Make sure it's the marine grade stuff. It has a hot melt adhesive on the inside that will flow when heated and seal the connection. It keeps water out and acts as a strain relief.

If you upsize your conductors, as the green one said above, you'll need to make sure you have the right size terminals and crimpers to do it right.

For your negative, ground it close to the radio.
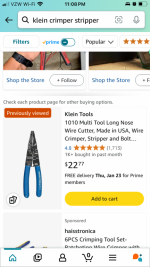
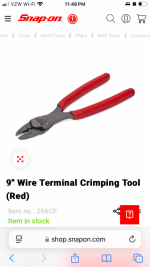
I’ve never tried the ratchet type. I use an older version of these at work. Very easy to get a positive crimp every time.
IMG_5348.png

Out of the shop I use tools similar to the ones I linked above. Not ideal for everyday professional work but much better than the pocket knife and pliers work I see on customers vehicles.
 

mmckenna

I ♥ Ø
Joined
Jul 27, 2005
Messages
25,598
Location
United States
I’ve never tried the ratchet type. I use an older version of these at work. Very easy to get a positive crimp every time.
Those can work if you crimp the correct side of the terminal, and make sure you fully crimp it all the way. Often you'll see crimp on the wrong side. You should be able to pull on the terminal/wire connection as hard as you can and it should not come apart.
The tool I linked to won't release the connector until it's been fully crimped. Also, it does a much wider crimp than the thin tools that most use. It's not just the mechanical grip that the crimp provides. If done right, it creates a gas tight connection that won't corrode/fail.

If you are comfortable using the tool you have, and haven't had any failures, then it's probably good enough.
But those full cycle crimp tools I linked to above have never failed me. The thin tools that often get used do really poor crimps, and I've had to clean up a lot of other peoples work when they use those.

Out of the shop I use tools similar to the ones I linked above. Not ideal for everyday professional work but much better than the pocket knife and pliers work I see on customers vehicles.

Yeah. I've had to clean up a few police vehicles at work that were done by upfitter shops. One of the most common problems are poor crimp terminals. I had to redo some work one of the radio shops did a while back because the installer used a cheap set of plier type crimpers. I'm sure you've seen some stuff, too.
 

Chris155

Member
Joined
Nov 21, 2024
Messages
20
Location
Southern Maryland
Those can work if you crimp the correct side of the terminal, and make sure you fully crimp it all the way. Often you'll see crimp on the wrong side. You should be able to pull on the terminal/wire connection as hard as you can and it should not come apart.
The tool I linked to won't release the connector until it's been fully crimped. Also, it does a much wider crimp than the thin tools that most use. It's not just the mechanical grip that the crimp provides. If done right, it creates a gas tight connection that won't corrode/fail.

If you are comfortable using the tool you have, and haven't had any failures, then it's probably good enough.
But those full cycle crimp tools I linked to above have never failed me. The thin tools that often get used do really poor crimps, and I've had to clean up a lot of other peoples work when they use those.


Yeah. I've had to clean up a few police vehicles at work that were done by upfitter shops. One of the most common problems are poor crimp terminals. I had to redo some work one of the radio shops did a while back because the installer used a cheap set of plier type crimpers. I'm sure you've seen some stuff, too.
The bold part 100%
 
Top