Multiple Antenna Question for 2M/70CM

Status
Not open for further replies.

W5lz

Active Member
Joined
Feb 28, 2019
Messages
617
Still looks like an uneducated guess on your part. You mention a capacitor and coil, have you taken a COMPACtenna apart to see what's in it? There is no coil and no specific capacitor so lets assume you have not taken one apart and are guessing wrong again. Apparently you didn't read some of the test reports on RR where the COMPACtenna was compared to a full size 1/4 wave and the COMPACtenna won, at least on VHF. I was skeptical, but I got one and tested it. Then I got two more. Now I know the truth. Maybe someday you will know, or maybe not.

Please don't read more into what I said than what I said. You're right, I've never taken one apart, but don't have too. That tuned circuit was just an example of a small antenna, not what the COMPACtenna is.
 

vagrant

ker-muhj-uhn
Premium Subscriber
Joined
Nov 19, 2005
Messages
3,187
Location
California
@prcguy @ccg_ga - Have some fun with the Compactenna and test it directly on a scanner with an adapter. I used a BNC to SO239 adapter with an NMO ring and plug. I'm doing the A/B comparison with the Diamond RH77CA, a well known and often used BNC antenna. Thus far, slightly better with Compactenna for a distant NOAA and local ATIS freqs. More testing to do. Practical on one's hip, absolutely not.

I would probably not test a large antenna like that directly on the scanner, but the 24 inch AS/1404 Milair antenna does rather well using just an adapter connected to the scanner. In my testing thus far, the AS/1404 does not like a ground plane. Of course, it's position on a manpack is void of a large groundplane as well which gave me the idea after looking at the particular PRC manual. Anyways, they're too easy to tip without a stand, so I hang them from the antenna as needed in open space. Hey, slap the Compactenna on the Icom IC-705 and use the battery clip to hold it on your belt. The unicorn is real! 🦄

Joking aside, I use them when camping directly on the scanners, so they sit/hang still and are practical in that environment.
 

ccg_ga

Member
Joined
Nov 24, 2018
Messages
112
Location
Cumming, GA
@mmckenna @prcguy

So I get to the VERY last step - crimping the SMA connector finally, and totally blew it. The NMO mount worked perfectly, no wire needed, nice and tight.

I ordered one Times Microwave TC-240-SM-RA-SS-X SMA Male Right Angle connector because I thought I had the connectors down by now. First, one of the little tabs where the coax center wire sits between the prongs for the center pin on the SMA connector broke off when I was trying to gently bend it back straight after test fitting the coax a couple of times.

And apparently .213 isn't the right crimp die size because I crushed the crimp sleeve.

IMG_7229.jpg
IMG_9061.jpg

So hopefully the last few questions - 1) I'm guessing the center coax cable is supposed to be soldered against the center pin connector on the terminal? 2) What is the right crimp die size for this connector and 3) is the top cap supposed to be soldered as well? It doesn't stay in place when you set it in the recess on the connector.

IMG_2936.jpg

@vagrant And I thought I was going to be able to test it today too!!
 
Last edited:

prcguy

Member
Joined
Jun 30, 2006
Messages
15,384
Location
So Cal - Richardson, TX - Tewksbury, MA
You need a .255" hex die. The center conductor needs to end at the edge of the solder prongs, otherwise it can short to the connector body. You can gently hammer the dome flat onto the connector back and it will squeeze into some grooves and stay put, or if the connector insulator is Teflon you can heat it very quickly and put some solder around the edge of the dome. You should also have some thick heat shrink over the cable/connector junction to weather proof it and to act as a strain relief.
 

ccg_ga

Member
Joined
Nov 24, 2018
Messages
112
Location
Cumming, GA
You need a .255" hex die. The center conductor needs to end at the edge of the solder prongs, otherwise it can short to the connector body. You can gently hammer the dome flat onto the connector back and it will squeeze into some grooves and stay put, or if the connector insulator is Teflon you can heat it very quickly and put some solder around the edge of the dome. You should also have some thick heat shrink over the cable/connector junction to weather proof it and to act as a strain relief.

Got it, thank you sir. I attempted to test it out even with the poor quality connection and the scanner was not picking up any signal, so it seems like the center conductor was probably shorting out against the body. Thankfully my crimping tool does have a .255 die so it looks like I am good there. I did put a piece of heat shrink on also but didn't shrink it up as I knew I would have to redo the connector.

Time to order more parts and try again, I appreciate it.
 

Ubbe

Member
Joined
Sep 8, 2006
Messages
9,055
Location
Stockholm, Sweden
It looks nicer and will strain relief better if you have the insulation going in 1/3 of the crimp lenght. I also use shrink tubes that have glue on the inside. It makes the coax almost impossible to pull out of the connector and will also help to water protect.

/Ubbe
 

ccg_ga

Member
Joined
Nov 24, 2018
Messages
112
Location
Cumming, GA
@prcguy @mmckenna

What is the correct way to solder the coax center pin cable to the prongs in the 90-degree SMA connector? I have looked all around Youtube and some other places but so far have not found any good videos that show the proper way to solder it on a 90-degree connector.

Should I heat the coax center pin cable up first then use a small amount of solder to attach it to the connector prongs?
 

Ubbe

Member
Joined
Sep 8, 2006
Messages
9,055
Location
Stockholm, Sweden
What is the correct way to solder the coax center pin cable to the prongs in the 90-degree SMA connector?
First cut it so nothing sticks out from the prong, measure with an instrument at the other end of the coax to be sure it has no contact to ground. The soldering tip has to be narrow enough to let you stick that down in the hole to the innerlead in the prong and still has room to feed solder to it. When the solder melts and make contact with the prong and starts to overflow it then it is enough solder and the plastic around the inner lead usually has begun to melt a little. But if the solder tip are too small it will cool down too much and it will be harder to make a good solder joint and will only tin the innerlead without "sticking" properly to the prong due to it being not heated up enough.

/Ubbe
 

prcguy

Member
Joined
Jun 30, 2006
Messages
15,384
Location
So Cal - Richardson, TX - Tewksbury, MA
Yes to all of this and maybe more depending on your skill level. The dielectric should be trimmed so it leaves several thousands of an inch gap between the dielectric and the prongs that get soldered so the dielectric does not touch the prongs. This is especially important with Teflon coax as the Teflon will expand under heat then contract some time later well after it cools. If you don't leave room for it to expand it will hydraulically push the coax out a bit during soldering.

If the center conductor is stranded you can leave it long at first and carefully tin it so it absorbs some solder but not enough to changes its diameter. Then trim to length so its flush with the prongs and does not protrude beyond them. To qualify for mil spec, any gold plated part must be tinned, then excess solder removed before final soldering. You don't have to do that but things will go smoother and faster if the parts are tinned first. The down side is you can wreak things or melt the dielectric if your not careful. This is were skill and experience comes in handy.


First cut it so nothing sticks out from the prong, measure with an instrument at the other end of the coax to be sure it has no contact to ground. The soldering tip has to be narrow enough to let you stick that down in the hole to the innerlead in the prong and still has room to feed solder to it. When the solder melts and make contact with the prong and starts to overflow it then it is enough solder and the plastic around the inner lead usually has begun to melt a little. But if the solder tip are too small it will cool down too much and it will be harder to make a good solder joint and will only tin the innerlead without "sticking" properly to the prong due to it being not heated up enough.

/Ubbe
 

ccg_ga

Member
Joined
Nov 24, 2018
Messages
112
Location
Cumming, GA
@cmdrwill @Ubbe @prcguy Thanks for the explanations. From reading those soldering the center pix coax is definitely going to be above my skill level.

So it sounds like using the Times Microwave EZ connectors as prcguy suggested in this thread and watching this video is probably what I need to do.

The center conductor is stranded since it's the 'ultra-flex' version of the LMR-240, so if I understand correctly in regards to how the EZ connectors work, I can twist the center conductor together tightly after it is cut, and there is no need to solder the center pin - the center conductor will sit inside of the center pin that is already installed into the connector?

I was looking at this specific Times Microwave connector EZ-240-SM-X. Is this the correct one to use?
 

prcguy

Member
Joined
Jun 30, 2006
Messages
15,384
Location
So Cal - Richardson, TX - Tewksbury, MA
I don't think stranded center conductor is compatible with EZ connectors.


@cmdrwill @Ubbe @prcguy Thanks for the explanations. From reading those soldering the center pix coax is definitely going to be above my skill level.

So it sounds like using the Times Microwave EZ connectors as prcguy suggested in this thread and watching this video is probably what I need to do.

The center conductor is stranded since it's the 'ultra-flex' version of the LMR-240, so if I understand correctly in regards to how the EZ connectors work, I can twist the center conductor together tightly after it is cut, and there is no need to solder the center pin - the center conductor will sit inside of the center pin that is already installed into the connector?

I was looking at this specific Times Microwave connector EZ-240-SM-X. Is this the correct one to use?
 

ccg_ga

Member
Joined
Nov 24, 2018
Messages
112
Location
Cumming, GA
I don't think stranded center conductor is compatible with EZ connectors.

Unfortunately it looks like that is correct. I just checked Times' site and the TC-240-SM-SS-X is the only SMA connector that is compatible LMR-240-UF. There is a second SMA connector that is, but it is reverse polarity.

Looks like I will be soldering the center pin.. time to find some more Youtube videos on that.
 

prcguy

Member
Joined
Jun 30, 2006
Messages
15,384
Location
So Cal - Richardson, TX - Tewksbury, MA
When installing EZ connectors you really need the factory prep tool and part of its function is to debur and bevel the end of the center conductor so it goes up into the internal claws of the center pin. You can't really bevel stranded wire and it would probably unwravel as its being pushed into the center pin.

Unfortunately it looks like that is correct. I just checked Times' site and the TC-240-SM-SS-X is the only SMA connector that is compatible LMR-240-UF. There is a second SMA connector that is, but it is reverse polarity.

Looks like I will be soldering the center pin.. time to find some more Youtube videos on that.
 

ladn

Explorer of the Frequency Spectrum
Premium Subscriber
Joined
Oct 25, 2008
Messages
1,318
Location
Southern California and sometimes Owens Valley
Personally, I would have terminated the coax with a UHF or Type N connector and either used an appropriate short jumper or adapter for the SMA connector. The minimum signal loss would be a small price to pay for the heartache of trying to install SMA connectors.
 

ccg_ga

Member
Joined
Nov 24, 2018
Messages
112
Location
Cumming, GA
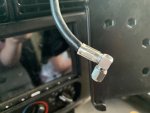
It took about an hour of practicing with the center pin and soldering iron but I was able to finish everything up today with a straight SMA male connector. I ended up using the Times Microwave TC-240-SM-SS-X and an RFI RSA-3402 right angle SMA adapter.

Since I used the LMR-240UF coax which has a stranded center conductor fitting the center pin for the SMA connector was a bit tricky. I ended up putting the center pin in an alligator clip on a soldering helping hand to hold it. I then heated a small amount of solder onto the pin, lined up the center conductor on the coax and then heated the center pin with the soldering iron to insert it. I found the trick to getting the center pin to fit on the center conductor was to insert it right after you stripped it back and don't try to twist the center conductor wires tighter.

So here is the finished product:

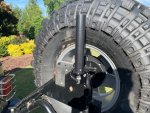
Antenna: COMPACtenna SCAN-III
Mount: Laird Technologies LBMB9034
NMO Mount: Laird Technologies VTPM800
Coax: Times Microwave LMR-240UF (30' cut to length after run to the Jeep dashboard)
Connector: Times Microwave TC-240-NMH-RA-D (N-Connector)

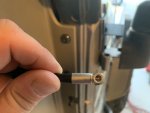
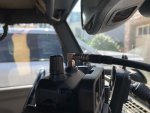
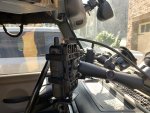
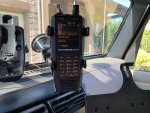
IMG_7678_1500.jpg

IMG_7668-1500.jpg

IMG_7669_1500.jpg

IMG_7673_1500.jpg

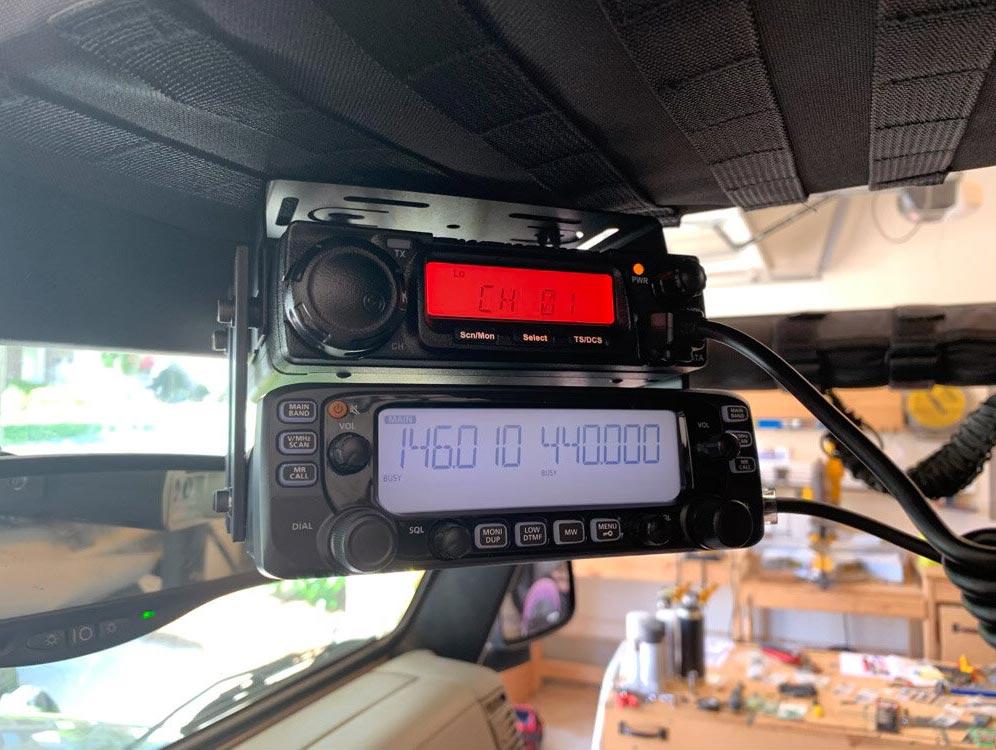
And all the toys in one shot from left to right:
Garmin inReach Explorer+ | Uniden SDS100 Scanner | iPad Pro 11" | Midland MXT400 GMRS Radio | Icom IC-2730A Ham Radio:


IMG_7656_1500.jpg

Thanks to everyone who contributed to this thread. It was a fun project and I learned literally a ton about radios and radio gear overall and look forward to sharing that knowledge with others going forward.

This is a link to part 1 of the write up I am working on about the project. There will be a series of 6 total posts that cover each aspect of the install.


mmckenna

I ♥ Ø
Joined
Jul 27, 2005
Messages
23,896
Location
Roaming the Intermountain West
Holy suction cups, Batman! How well do those things hold when off road?

I agree, turned out nice, you really put a lot of time, effort and attention to detail into it. Sounds like you've nearly mastered the art of installing coax connectors. It takes time, patience and trail and error.

I'm running an InReach mini myself, but not mounted anywhere, just clipped to my backpack. I've never needed it for emergencies, but it sure is nice to be able to check in when I'm way out in the sticks. Kind of makes my wife happy to now I'm still alive. (I think)
 

ccg_ga

Member
Joined
Nov 24, 2018
Messages
112
Location
Cumming, GA
Holy suction cups, Batman! How well do those things hold when off road?

I agree, turned out nice, you really put a lot of time, effort and attention to detail into it. Sounds like you've nearly mastered the art of installing coax connectors. It takes time, patience and trail and error.

I'm running an InReach mini myself, but not mounted anywhere, just clipped to my backpack. I've never needed it for emergencies, but it sure is nice to be able to check in when I'm way out in the sticks. Kind of makes my wife happy to now I'm still alive. (I think)

Haha, honestly they hold up pretty well. Both the inReach mount and the SDS100 mount are Ram suction cups, so they are pretty large. If it is sitting out in the sun for a while and the glass heads up sometimes they do fall off, but overall they do well with all the vibration off-road. One thing that would make them better is to put a little adhesive on the plastic. The Amazon special phone iOttie phone holder has a light adhesive and it has never fallen off since I mounted it.

Checking in is exactly why I have the inReach. I was out by myself one time and didn't come back home until about 9 PM at night and my wife thought I fell off the side of a mountain and was not happy when I got home. I like how you can have the pre-programmed messages and those are easy to send. I had a Spot satellite communicator first, and it was a piece of junk so I sold it and got the inReach. Much better service with the Iridium satellite network.

I appreciate it, and thanks for all your help and input. It was key to being able to do this project myself.
 

mmckenna

I ♥ Ø
Joined
Jul 27, 2005
Messages
23,896
Location
Roaming the Intermountain West
Checking in is exactly why I have the inReach. I was out by myself one time and didn't come back home until about 9 PM at night and my wife thought I fell off the side of a mountain and was not happy when I got home. I like how you can have the pre-programmed messages and those are easy to send. I had a Spot satellite communicator first, and it was a piece of junk so I sold it and got the inReach. Much better service with the Iridium satellite network.

I've heard the same thing about Spot units. I've heard their customer support is pretty awful, too.
That drove me to the InReach. I have a few remote sites at work, and I usually carry a satellite phone in the truck for emergencies. But for checking in with the wife and personal use, I've found the InReach units to be a good deal. I probably only use it once or twice a month, but it's handy. I think I'm paying something like $12/month for the service, pretty good deal in my book. I have the precanned messages set up specifically for that. Linking it to my phone gives me access to the rest, although looking back I sort of wish I'd spent the extra on the full unit, rather than just the Mini. At a few ounces, it's not hard to clip on the back of my pack and keep it with me.


I appreciate it, and thanks for all your help and input. It was key to being able to do this project myself.

There are some smart people on this site that have traditionally been very helpful. Glad we could assist, and glad to see you stuck with it.
Much nicer looking set up than a bunch of mag mounts strung all over the place.
 
Status
Not open for further replies.
Top