After turning in my leased vehicle we were left with one vehicle in the garage: “her” Tahoe. I previously had my CS800D in my leased vehicle and now wanted to move it to the Tahoe. My better half initially said, “No holes, no wires, no antennas, and no visible radio stuff” in the Tahoe. But she is a wonderful partner and I was able to negotiate her to a compromise of “no holes, no wires” but it was still going to be a tall order for me to figure out a minimalist, unobtrusive install of the CS800D. This is the tale… with pictures… of what I’ve done.
Doing this type of VHF/UHF mobile radio install is made possible with these significant components and design factors. Much of it is probably applicable to other types of vehicles -
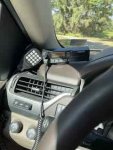
CONTROL HEAD - The radio Control Head was placed on the dashboard to the left of the instrument cluster, and is invisible from the passenger side. The head is held in place by the magnet base on the dash and a small plate that adheres to the bottom of the Control Head. This allows easy removal of the head for “aesthetic” reasons if necessary. (Yes, I do need to find a better place for the mic. Probably another magnet mount on the lower portion of the dash below the lighting controls.)
MAIN BODY - The Main Body of the radio is located in a sub-floor compartment in the back left of the cargo area. It is connected via Cat6E flat Ethernet cable carefully tucked into floor / door / carpet molding edges from the dashboard down and all the way back to the compartment in the back. No cutting, no visible wires.
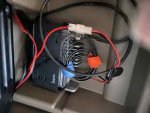
POWER - For the initial “proof of concept” I used a 12V outlet on the left side of the 3rd row seat. Ugly and subject to disconnect or breaking.
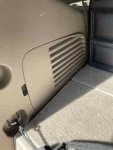
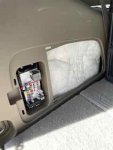
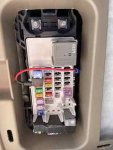
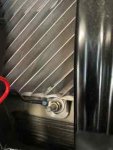
Thanks to the Tahoe PPV Upfitter’s Guide, I was reminded that there was a fuse block behind the left-side panel in the back that houses the tire jack. The better solution was to open that panel and use an Add-A-Fuse adapter. There were plenty of open sockets. A bonus was that there was also a threaded bolt connected to the vehicle ground conveniently located near the fuse box. Use the multimeter to ensure any bolt you select is in fact connected to the vehicle ground!
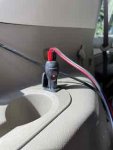
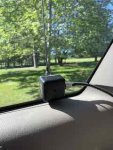
ANTENNA - is a Tram 1191 thru-glass mount 2M / 70cm dual-band antenna. Careful… there is another Tram that is made for VHF / UHF commercial bands (Tram 1192) and one for just VHF high band (1189). Should it be mounted higher on the glass closer to the roofline? Yes! No question. However even at this height I get a little “tap” of the antenna tip on the overhead transom of my garage door every time in or out. Any higher would be a “sproing” and probably bent / broken antenna. The CS800D has an “N” connector (not PL-259) for RF, so rather than use an adapter I had a custom length of LMR-240 made up with an N-connector on one end a matching connector for the antenna on-glass box (RP TNC or TNA… check first). The antenna comes with a tiny plastic tuning alignment tool. After you finish the install connect your SWR meter and apply the tuning tool to the capacitor slot in the center of the box. Adjust it as you watch the SWR meter on transmit (or use a VNA). Mine didn’t “swing” too far even at limits of the cap’s travel. But I have had them be very touchy in the past. 2M SWR was about 1.3 and UHF about 1.7.

Not bad for an “Amateur”! 73 & SK
Doing this type of VHF/UHF mobile radio install is made possible with these significant components and design factors. Much of it is probably applicable to other types of vehicles -
- The Connect Systems CS800D is one of the few (maybe only) dual-band VHF/UHF FM and DMR radios that has a Control Head that can be separated from the Main Body of the radio.
- The separation cable to the Control Head is standard Cat6 Ethernet cable and can be quite long… mine was 25 feet (but probably could have gotten by with 20 ft).
- A Tram 1911 Thru-Glass mount antenna made the “no holes” antenna possible. I’ve had four of these with four different vehicles in the last 15 years and they’ve all worked just fine.
- Dashboard mounting was accomplished with adhesive-backed magnetic mounts designed for cellphones, GPS, and other mobile accessories.
- Multimeter to check for 12V power, vehicle ground, and continuity of the connections to the terminals and power leads that you make
- A plastic spudger or other not-sharp tool to carefully push the flat Ethernet cable into place under trim and carpet
- Wire cutters and terminal crimpers
- 14 ga or larger 2-conductor wire
- Assorted ring terminals
- Connectors for the 12V power cable (I used Anderson PowerPole because they are quick disconnect / connect, but other butt connectors could be used)
CONTROL HEAD - The radio Control Head was placed on the dashboard to the left of the instrument cluster, and is invisible from the passenger side. The head is held in place by the magnet base on the dash and a small plate that adheres to the bottom of the Control Head. This allows easy removal of the head for “aesthetic” reasons if necessary. (Yes, I do need to find a better place for the mic. Probably another magnet mount on the lower portion of the dash below the lighting controls.)

MAIN BODY - The Main Body of the radio is located in a sub-floor compartment in the back left of the cargo area. It is connected via Cat6E flat Ethernet cable carefully tucked into floor / door / carpet molding edges from the dashboard down and all the way back to the compartment in the back. No cutting, no visible wires.

POWER - For the initial “proof of concept” I used a 12V outlet on the left side of the 3rd row seat. Ugly and subject to disconnect or breaking.

Thanks to the Tahoe PPV Upfitter’s Guide, I was reminded that there was a fuse block behind the left-side panel in the back that houses the tire jack. The better solution was to open that panel and use an Add-A-Fuse adapter. There were plenty of open sockets. A bonus was that there was also a threaded bolt connected to the vehicle ground conveniently located near the fuse box. Use the multimeter to ensure any bolt you select is in fact connected to the vehicle ground!


ANTENNA - is a Tram 1191 thru-glass mount 2M / 70cm dual-band antenna. Careful… there is another Tram that is made for VHF / UHF commercial bands (Tram 1192) and one for just VHF high band (1189). Should it be mounted higher on the glass closer to the roofline? Yes! No question. However even at this height I get a little “tap” of the antenna tip on the overhead transom of my garage door every time in or out. Any higher would be a “sproing” and probably bent / broken antenna. The CS800D has an “N” connector (not PL-259) for RF, so rather than use an adapter I had a custom length of LMR-240 made up with an N-connector on one end a matching connector for the antenna on-glass box (RP TNC or TNA… check first). The antenna comes with a tiny plastic tuning alignment tool. After you finish the install connect your SWR meter and apply the tuning tool to the capacitor slot in the center of the box. Adjust it as you watch the SWR meter on transmit (or use a VNA). Mine didn’t “swing” too far even at limits of the cap’s travel. But I have had them be very touchy in the past. 2M SWR was about 1.3 and UHF about 1.7.


Not bad for an “Amateur”! 73 & SK

