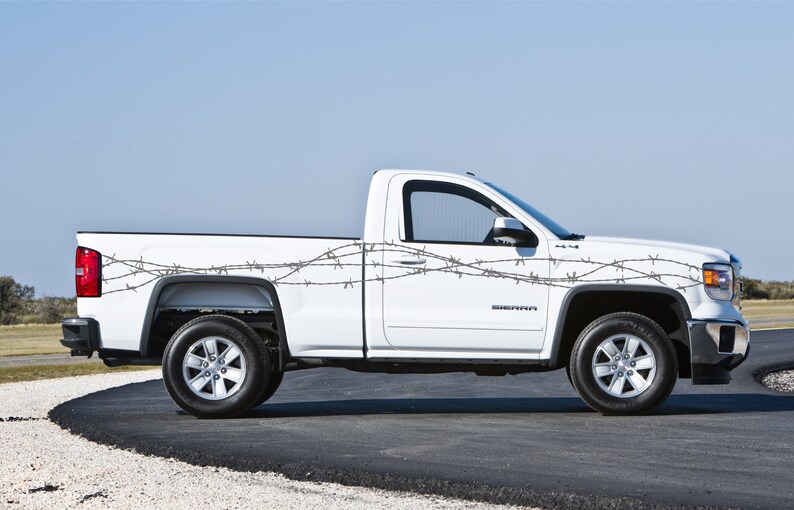
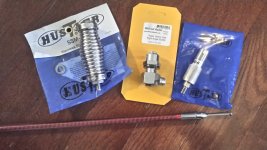
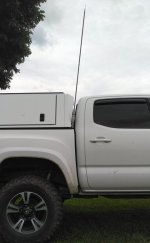
You're right on all counts @mmckenna. The inside of this bed is some sort of fiberglass composite (best I can tell). Which makes flex a more prominent issue I'm sure. The second picture is a little deceptive though. The flange on that bracket contours around the cab better than it looks. I probably could have taken a picture from above and done it more justice. Still, it's only 5/8" worth of gap, and I think you're right, a full flex would have the flange scraping the back of the cab (I'm thinking lateral movement). That's why I mentioned scooting the topper back about half an inch. In the third picture you can see that there's a decent gap. Another half inch and the mount should clear the cab even if she's wrung like a dish rag (but I reserve the right to be wrong). It needs to be a bit further back anyway to thwart an unrelated issue at the tailgate (she leaks).
-
To anyone looking to acquire commercial radio programming software:
Please do not make requests for copies of radio programming software which is sold (or was sold) by the manufacturer for any monetary value. All requests will be deleted and a forum infraction issued. Making a request such as this is attempting to engage in software piracy and this forum cannot be involved or associated with this activity. The same goes for any private transaction via Private Message. Even if you attempt to engage in this activity in PM's we will still enforce the forum rules. Your PM's are not private and the administration has the right to read them if there's a hint to criminal activity.
If you are having trouble legally obtaining software please state so. We do not want any hurt feelings when your vague post is mistaken for a free request. It is YOUR responsibility to properly word your request.
To obtain Motorola software see the Sticky in the Motorola forum.
The various other vendors often permit their dealers to sell the software online (i.e., Kenwood). Please use Google or some other search engine to find a dealer that sells the software. Typically each series or individual radio requires its own software package. Often the Kenwood software is less than $100 so don't be a cheapskate; just purchase it.
For M/A Com/Harris/GE, etc: there are two software packages that program all current and past radios. One package is for conventional programming and the other for trunked programming. The trunked package is in upwards of $2,500. The conventional package is more reasonable though is still several hundred dollars. The benefit is you do not need multiple versions for each radio (unlike Motorola).
This is a large and very visible forum. We cannot jeopardize the ability to provide the RadioReference services by allowing this activity to occur. Please respect this.
You are using an out of date browser. It may not display this or other websites correctly.
You should upgrade or use an alternative browser.
You should upgrade or use an alternative browser.
New to CB and New to the Forum...
- Thread starter jcrmadden
- Start date
slowmover
Active Member
(Edited last post).
mmckenna
I ♥ Ø
The second picture is a little deceptive though. The flange on that bracket contours around the cab better than it looks. I probably could have taken a picture from above and done it more justice.
That is a sweet looking bracket and a nice design. I like it. Easy and simple design. I've done a lot of fabrication with that stock hardware store aluminum angle stock.
One of our engineers at work has a fleet truck with ladder rack on it. When fleet assembled the ladder rack, they put one of the bolts in backwards so the long end was pointing towards the cab. First speed bump they went over, it hit the back of the cab and made a pretty good scratch/dent. A "field expedient modification" was done with a sawzall to cut the excess bolt length off and prevent further damage to the cab. The cabs can move around quite a bit on bigger bumps.
I choose drivers side for single antennas on big trucks as it’s less work to remember to keep it out of the obstacles.
Nice looking mounts!
.
Thanks @slowmover. He only charged $30 for the pair too.
General question to all: If I mount an antenna that isn't hooked up does it still change the send/receive pattern for the one that is?
I was thinking about running the 4' on the passenger's side and the 7' on the driver's side. One: the shorter antenna requires less of my attention regarding clearance AND it's in a blind spot on the passenger side. Two: When clearance demands that the 7 footer comes off it's on my side of the vehicle (just more convenient).
I saw that there are coax switches that would make the transition even more convenient. Are there known issues with those?
slowmover
Active Member
At antenna feedpoint, this is least expensive CMC choke:
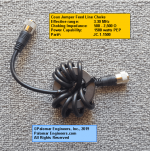
Budget has kept me from finishing this:

 forums.radioreference.com
.

Budget has kept me from finishing this:
Antenna Feedpoint Coax Choke
Feedpoint Choke Mobile, it’s a nicely impressive addition to add a feedpoint choke in my experience. Reduction of CMC with another coax choke at transceiver end. I’ve used a somewhat expensive version that’s been difficult to mount on the exterior of the big truck. Time for simpler. Buried...
.
slowmover
Active Member
Copper or Aluminum Flashing Tape under your mount? Others here could advise what to do with that composite bed problem.
RF Bond to Cab, is another.
.
RF Bond to Cab, is another.
.
The topper is modular and made up of individual panels that are bolted together. Each panel is isolated from the next by composite "bushings" (for lack of a better word) that seat the hardware. I would say that it has a very poor dc ground. It's probably close to perfectly RF insulated. It's setting on top of plastic bed rail protectors and thick rubber gaskets, further insolating it from the rest of the truck. Cab mount bushings, door hinge bushings, exhaust hanger bushings... Nothing metal on this truck touches anything else that's metal it seems...
Bonding HAS to happen.
Each panel to adjacent, topper to cab, topper to bed, bed to cab, cab and bed to frame. Then I'll start on peripheral things. Hood, exhaust, doors, etc...
Bonding HAS to happen.
Each panel to adjacent, topper to cab, topper to bed, bed to cab, cab and bed to frame. Then I'll start on peripheral things. Hood, exhaust, doors, etc...
Last edited:
slowmover
Active Member
On the stud, glue the cap underneath in place. Use very light bit of di-electric grease on male ends and do not use threads to pull together to coax. Tap into place with no strain on threads.
On the QD, the spring hidden inside will corrode over time and/or get weak (takes a good while, maybe years).
On the spring, it’s the copper braid that’ll deteriorate over time. CAL-AV recommends using LPS aero with a few drips that it’ll wick along the braid. (Maybe use on QD spring, too).
The spring may not be necessary and is quite big.
That spring, plus QD, and on a HD stud will put a good bit of force on the mount, proper, given a 6-7’ antenna.
Replace antenna nail with SS or other non-corroding. (Polish that). Get extra Allen screws while have new comparable at hand.
It’s not recommended, but I use REJEX brand wax on antenna body. Use FLITZ on other metal/plastic. 3K miles/week is hard on them. Need to clean regularly (plastic scrubbie, first, lightly. Like fingernail test on auto body paint). The antenna clear plastic will deteriorate over time. Takes awhile. I use a small thin zip tie at base of plastic cover to stop splits from moving upwards.
Need to have strong awareness of icy conditions affecting performance. May want to remove and service antenna, first.
After installing antenna feedpoint choke, triple tape seal coax connections according to other posts you’ll find here.
Dedicate double wrench sets needed to assemble and dissemble. No Crescent wrenches or Vise-Grips. Hobo Freight quality is fine. Padding around SWR meter same bag. Small water pump pliers also (coax ends; be gentle). Extra lock washers, plastic space washers, fuses, tape, etc. (And cleaning as above). All same bag; separated.
Actual radio electrical tool/supply bag is a separate item (home shop).
High perf CB means regular inspection & maintenance. Dedicated bag & tools/gear under rear seat means it’ll happen. I may be backed in at a receiver waiting to unload. That’s always a good time for me to do the ordinary inspect & clean type stuff (antenna removal, not coax).
.
Last edited:
slowmover
Active Member
On the stud, glue the cap underneath in place. Use very light bit of di-electric grease on male ends and do not use threads to pull together to coax. Tap into place with no strain on threads.
On the QD, the spring hidden inside will corrode over time and/or get weak (takes a good while, maybe years).
On the spring, it’s the copper braid that’ll deteriorate over time. CAL-AV recommends using LPS aero with a few drips that it’ll wick along the braid. (Maybe use on QD spring, too).
The spring may not be necessary and is quite big.
That spring, plus QD, and on a HD stud will put a good bit of force on the mount, proper, given a 6-7’ antenna.
Replace antenna nail with SS or other non-corroding. (Polish that). Get extra Allen screws while have new comparable at hand.
It’s not recommended, but I use REJEX brand wax on antenna body. Use FLITZ on other metal/plastic. 3K miles/week is hard on them. Need to clean regularly (plastic scrubbie, first, lightly. Like fingernail test on auto body paint). The antenna clear plastic will deteriorate over time. Takes awhile. I use a small thin zip tie at base of plastic cover to stop splits from moving upwards.
Need to have strong awareness of icy conditions affecting performance. May want to remove and service antenna, first.
After installing antenna feedpoint choke, triple tape seal coax connections according to other posts you’ll find here.
Dedicate double wrench sets needed to assemble and dissemble. No Crescent wrenches or Vise-Grips. Hobo Freight quality is fine. Padding around SWR meter same bag. Small water pump pliers also (coax ends; be gentle). Extra lock washers, plastic space washers, fuses, tape, etc. (And cleaning as above). All same bag; separated.
Actual radio electrical tool/supply bag is a separate item (home shop).
High perf CB means regular inspection & maintenance. Dedicated bag & tools/gear under rear seat means it’ll happen. I may be backed in at a receiver waiting to unload. That’s always a good time for me to do the ordinary inspect & clean type stuff (antenna removal, not coax).
.
The home shop needs some anti-corrosion for “open” connections, like a ring terminal, etc.
BURNDY Penetrox
is one you’ll see for men putting together big antenna systems at home (Amateur). Kinda too big for truck bag. As little is needed.
What I carry in truck is Super Lube as it has other uses for the vehicle.
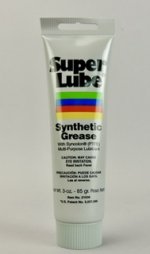
A very slight almost non-existent amount on ring terminal, maybe on a fastener body, etc.
Not dry, but not “wet” either. Wipe off after fastening things down as well.
You’ll be able to find discussions about this elsewhere. Minimal amount is my practice.
Using paint or battery terminal spray or butyl tape OVER fastened items is slightly different.
I don’t like using anything on coax besides tape covers.
The above is for 12V and RF Bond/DC Ground type work.
Scotch 88 and self-fusing silicone tape for joints (look up method per @prcguy )
.
@slowmover are you sure I can't just slap this together and key up?On the stud, glue the cap underneath in place. Use very light bit of di-electric grease on male ends and do not use threads to pull together to coax. Tap into place with no strain on threads.
On the QD, the spring hidden inside will corrode over time and/or get weak (takes a good while, maybe years).
On the spring, it’s the copper braid that’ll deteriorate over time. CAL-AV recommends using LPS aero with a few drips that it’ll wick along the braid. (Maybe use on QD spring, too).
The spring may not be necessary and is quite big.
That spring, plus QD, and on a HD stud will put a good bit of force on the mount, proper, given a 6-7’ antenna.
Replace antenna nail with SS or other non-corroding. (Polish that). Get extra Allen screws while have new comparable at hand.
It’s not recommended, but I use REJEX brand wax on antenna body. Use FLITZ on other metal/plastic. 3K miles/week is hard on them. Need to clean regularly (plastic scrubbie, first, lightly. Like fingernail test on auto body paint). The antenna clear plastic will deteriorate over time. Takes awhile. I use a small thin zip tie at base of plastic cover to stop splits from moving upwards.
Need to have strong awareness of icy conditions affecting performance. May want to remove and service antenna, first.
After installing antenna feedpoint choke, triple tape seal coax connections according to other posts you’ll find here.
Dedicate double wrench sets needed to assemble and dissemble. No Crescent wrenches or Vise-Grips. Hobo Freight quality is fine. Padding around SWR meter same bag. Small water pump pliers also (coax ends; be gentle). Extra lock washers, plastic space washers, fuses, tape, etc. (And cleaning as above). All same bag; separated.
Actual radio electrical tool/supply bag is a separate item (home shop).
High perf CB means regular inspection & maintenance. Dedicated bag & tools/gear under rear seat means it’ll happen. I may be backed in at a receiver waiting to unload. That’s always a good time for me to do the ordinary inspect & clean type stuff (antenna removal, not coax).
.
You're killing me smalls! 😂
**Grumble grumble**
**Drags out tool bucket**
**Grumbling continues**
Fine. I'll do it right.
slowmover
Active Member
@slowmover are you sure I can't just slap this together and key up?
You're killing me smalls! 😂
**Grumble grumble**
**Drags out tool bucket**
**Grumbling continues**
Fine. I'll do it right.
It’ll depend on how soon you tire of doing the whole thing over. This, “toughening-up process”, is key to success. Repetition strengthens & confirms.
Nowadays I don’t even blink I realize I’ve missed something and have to do it over.
— Much of that was in changes to system components. Experiments.
To me, Radio is an ever-increasing focus on smaller & smaller aspects.
Be glad it’s not a big truck.
— Start the 12V and Coax runs from here.
— Don’t PO the people who own the truck you drive.
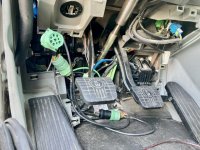
Running slightly oversized 12V power that’s got some gold-plating (overkill) is my best example of Doing It Right. As it’s stand-alone in comparison to Coax that’s interwoven with everything, it’s a satisfying first step to get DONE!
I didn’t find the model to follow past Mr Applegates advice so I’ve tried to provide that which might make it easier for others (mainly truck drivers). Someone else would be better than a guy starting from scratch. Lucky there’s the crew at RR with some heavy experience.
Heres hope you take pictures and make notes that a few years from now the aids to memory allow you to be of help.
It’s not about helping the lazy ones, as no one can. That effort WILL be aid and encouragement to those looking at a dash half torn out.
The 4WD pickups with bed cap expected to perform with HF off-road in 2024 are awaiting your install, tests, and experienced results. I’ve sent link to this thread to my Alaskan son with 3500 diesel and new LEER cap installed last week about the Appalachian man for this reason.
I don’t know squat about using a coax switch, (know of one truck driver), but that same son knows he can’t run his Tarheel 2 in some instances. Maybe you’ll blaze that path. Or find what’s workable.
.
Last edited:
slowmover
Active Member
On thinking about it I realize I’ve a good number of other men to whom I may send your thread links. They’ve minimal to zero interest in CB at this point. Your success may lead to their acceptance (success).
A reason we see some “boys” use only GMRS/FRS is that wishful thinking has supplanted the pleasure of problem-solving.
HF looks too hard = no one is using it.
The other services are good to have. “Best”, maybe, depending on who’s around. But not ever a substitute. No repeater access gonna be a bear.
“Portable” field ops will be an interesting one for us all who’re new to being parked in a good spot miles from pavement and are now trying an antenna hung from tree branches or maybe on a tripod. Has to pack up and be out of the way under the bed cap.
All the others — radio-averse — must have Jesus on cellphone speed-dial. Carry pepper spray and a Taser for grizzly bears.
Others may wonder why this confidence? Because your hours of use will rapidly dispel false approaches. Day & Night, Summer & Fall, from one geographic region into the neighboring and back. Regulars to give feedback. Odd observations that one day coalesce into insight. Etc.
I know I’ll be grateful.
.
Last edited:
Thanks for the encouragement @slowmover, real good time for it
Been at it about all day...
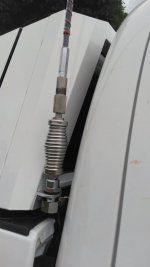
Drilling, bolting, dry fitting, unfitting, lubing, refitting, removing panels, hiding cables... you know the deal
Even installed a mic lanyard as a finishing touch.
Almost beer time...
Key up for a radio check and... NOTHING!
"SWR HI"
🐋 💩
I took the quick disconnect off, reinstalled the antenna, and tried again SWR HI
I took the spring off, reinstalled the antenna and SWR HI
I changed out the stud SWR HI
I changed coax cables SWR HI
I hooked the Lil' Wil back up and plopped it on the roof SWR HI
What in the actual ####?!
I got into the menu settings on the radio and turned SWR protection off. When I dead key SWR pegs the meter, and if I try to speak I get the feedback squeal/echo.
Everything is back the way I had it when the radio was working fine... What gives?
Been at it about all day...

Drilling, bolting, dry fitting, unfitting, lubing, refitting, removing panels, hiding cables... you know the deal
Even installed a mic lanyard as a finishing touch.
Almost beer time...

Key up for a radio check and... NOTHING!
"SWR HI"
🐋 💩
I took the quick disconnect off, reinstalled the antenna, and tried again SWR HI
I took the spring off, reinstalled the antenna and SWR HI
I changed out the stud SWR HI
I changed coax cables SWR HI
I hooked the Lil' Wil back up and plopped it on the roof SWR HI
What in the actual ####?!
I got into the menu settings on the radio and turned SWR protection off. When I dead key SWR pegs the meter, and if I try to speak I get the feedback squeal/echo.
Everything is back the way I had it when the radio was working fine... What gives?
slowmover
Active Member
Use the roof mag mount till issue becomes clearer.
Ck Coax for Condition.
What voltage at radio before D-K? (Engine idling).
Then, having checked no cross-thread and proper mating, set D-K up as:
RF-G, near off
RF-P, all down
SQ, up a ways
Mic-G, backed off.
Talk-Back turned off. (Monitor).
Unplug speaker; if any.
Is the radio in proper band? (D; where Ch. 20 is 27.205?)
(Can run a Re-Set on Radio as settings no big deal to later go thru; save for last).
Using Lil Wil: What is it on 1, and on 40?
Move whip to best on Ch 20.
Standard checks where it’s best to be using a separate SWR meter as control to one in radio.
Coax problem or cracked antenna or antenna mount problem if 2.0+ on 1, 40, and 20. Mount problem dominates. So use Wil till clear about radio function.
Remember that we, ah, “welcome” the pleasure of problem-solving. Today is Lesson One in how to develop self-deprecatory humor: All men are sinners. All men have feet of clay. Even Jesus had antenna mount problems.
.
Last edited:
slowmover
Active Member
We are made of music. So I find the frequency range to work my insides as I get back to work.
105F asphalt parking lot is possible.
All I have to do is get on pitch.
This is the earthly practice for when things really matter and men we’ll never meet are depending on how we handle the microphone in same wise. It won’t be the words.
Move it west to Texas.
Ask me . . and I’ll reply that the firing order is mixed up on that Slant-6. It’ll come clear.
.
Last edited:
slowmover
Active Member
“Looks fine”, to me doesn’t mean same as tested:I reset radio to default, Lil Wil back on roof center, coax and terminals look fine, SWR is maxed out on all channels
.
niceguy71
Active Member
starting with the simple things..... you used to have a Uniden pro 510 I think and the little will antenna... I also think you sent the Uniden back and got a Radioddity QT60.... ( great radio) the uniden doesn't have a built in SWR meter, so how did you set the SWR before? . what are you using for a SWR meter?I reset radio to default, Lil Wil back on roof center, coax and terminals look fine, SWR is maxed out on all channels
are you sure it was set correctly last time? meaning maybe the LiL Will was never set correctly???...you also said the Little will and Uniden performed horribly if I remember. I think less than a mile to a pilot car.... my little handheld CB's with a rubber ducky antenna can do a mile... so you may have had problems before.... and of course you had a different vehicle last time also.
you have to start someplace... ... all these guys in here are much, much smarter than me ... in other words don't listen to me.
BUT if it was me... I would keep playing with the Little Will as you already own it and if you cut the whip too short in playing with it.. no big loss.... but most magnetic mounts are pretty easy to set the SWR on and they seem to achieve a good ground plane in the middle of the roof... at least it should pretty easily get under 2.0... so playing with the little Will is the easiest way to start... if you can get the SWR set on that you will then know the radio and vehicle are working.
..... if you know someone with a decent set up ask them to plug your radio into their antenna and see how it works..... see what the radio SWR meter shows on an antenna that you know the SWR on..... that would eliminate the radio as a problem source ( I doubt it's the radio)....
I've never had any luck with the antenna systems you're working on.. spent thousands of dollars and hundreds of hours and they always wound up in the trash... now I just throw a Tram 3500 on the rooftop of whoever's vehicle I'm working on and call it a day! they work great!
not the best antenna out there but they work without a lot of trouble.
I have 3 spares... I am getting my friends back into CB... they keep buying Firestick antenna's or some foolishness and proudly come over to show off their system and have me set the SWR..... we always set it the best we can then I send them out for a range test.... I talk to them on my Base station as far out as I can...... they always come back pretty disappointed with only a couple miles of range..... so I throw on one of my spare Tram 3500 and they always go out 12 plus miles with a decent radio.
..... I just spent a day on a jeep trying to get a ground plane on a taillight mount then a spare tire mount... tried firesticks and some other fiberglass antenna's because my friend, one doesn't have a roof and two doesn't want a hole in the hood... ...next time he is over I'm throwing one of my spare tram 3500's on the corner of the hood to show him how simple and easy it is.. ( hopefully)
I know the guys you're chatting with are the best of the best.... and will straighten out your system but before you go too crazy just work on the magnet mount LiL Will and get that sorted out first. I personally think that will be the easiest way to start... once you know the radio and vehicle are working good then tackle the other antenna,
Similar threads
- Replies
- 18
- Views
- 1K
- Replies
- 10
- Views
- 2K
- Replies
- 14
- Views
- 1K


