Hey y'all!
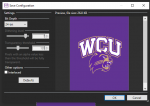
I was going through some forums last night and I saw you're able to change the opening.bmp file and I was testing it out with some of the files other users provided and it worked no issues. However, when I tried to make my own photos, I can't get it to work. I used paint.net and making sure it fits in the 240x320 size with 24 bit but still nothing. I was wondering if anyone can help. I've attached the photo I'm trying to use in the same size
For a custom Opening Graphic Boot Screen For The SDSX00 Scanners, use a graphics editing program to set these parameters...
(1) The image must be in the .bmp format (you can't just change a jpg or png file extension to bmp, it must be "saved as" a bmp format in a graphics editing program).
(2) The image must be named opening.bmp (lower case only)
(3) The image must be at 24 bit color depth (16 million colors)
(4) For use in the SDS100 the image must be exactly 240 x 320 (width x height)
(5) For use in the SDS200 the image must be exactly 480 x 320 (width x height)
(6) The image must be placed in the BCDx36HP Folder on the scanner's SD card (same location as the profile.cfg and other files).
If even one of the above parameters is not correct, the scanner won't recognize the graphic at all, and will boot up with whatever text was there previously.
Once the graphic is in place on the card and working, it won't be overwritten by any "writes" from Sentinel to the scanner, regardless of what the "opening message" text is set to in the Sentinel Profile Editor. The scanner will always boot with the graphic if it's set with the correct parameters, and in the correct location on the SD card. Reformatting the card or using the "Clear User Data" function will, of course, delete the custom graphic from the card.
To change back to the original opening screen text, just delete the .bmp graphic file you put in the folder on the SD card, and restart the scanner.


