I ordered the new Tri-Bay rack about a month ago and it finally arrived today from AudioRax. Being that it is custom made it took a while but it is worth the wait.
I was pleasantly surprised to see that it arrived fully assembled, I had assumed it was going to require assembly. Being 5 feet wide the box was taller than my wife since it shipped upended. With no equipment installed it was not particularly heavy but it was a bit of work to remove it from the double box. It was very well protected and arrived undamaged.
I placed it on my wheel cart in the office. Since I already had all the equipment in the office waiting I only needed to collect a few tools and off I went. I soon ran into a minor snag, the threaded holes on the rails did not match the panels. There are two standards, I think I forgot to specify the one I needed and they sent the default one. I already had a tap for the rack screws so I grabbed the drill and drilled and tapped 8 new holes on both outside bays. The 746 panel fit right in.
I mounted the 746 in the center bay. I then mounted the 4 dual-radio panels. From the rear I installed the AC power strip, PowerPole RigRunner, USB hub and Stridsberg multicoupler.
I then ran all the interior wiring in the cabinet. Each of the scanners has an antenna jumper, power lead and serial port of course, there was also power leads for the 746 and 2 two-way radios.
After all that I moved the cabinet to the desk for final setup. The desk itself is on nylon sliders so I slid it out to connect the antenna leads and AC line cord. I placed the computer (Intel H.C. NUC) and monitor as well as the R8500 on top of the cabinet.
After testing the power leads I moved the desk to it’s place and set up the accessories (mics, computer i/o etc. After a good wipe down with a MF cloth I was done.
Since I had already set up all the racks and wiring harnesses last week it took me about 3 hours to do all the work, minus a half hour for dinner. I had not expected to even start it tonight but I already finished since I did not have to assemble the cabinet.
I already have one thing on my to-do list. The power supply that came with the 746’s rack has a loud fan. It seems to be on half the time so I think I will go to an Astron linear supply since there is no fan needed.
So here are the pics:
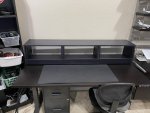
Here is the empty rack on the desk. I tried it to check the fit before I installed all the stuff. The radios and other stuff that is going into the rack is on the bookshelf to the left.
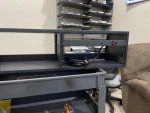
I installed the AC power strip on what will be the left rear. This puts the line cord on the correct side to the outlet.
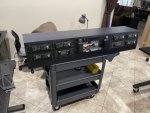
Just about ready to flip the cabinet around to install the wiring.
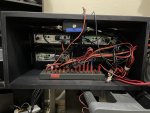
From the rear of the right bay. This bay has the multicoupler (top) and RigRunner (bottom).
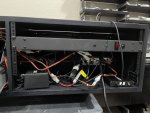
The left bay has the AC power strip, AirNav Radar Box and the power supply for the USB hub.
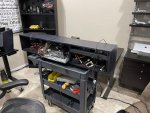
The wiring is just about done, ready to transition to the desk.
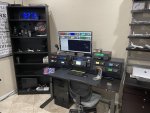
Here is the completed and operational setup. I am running ProScan for virtual control. Each 996XT is set to a difference screen color, matched by it’s computer partner.
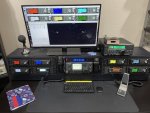
A closer view of the completed setup. In addition to the 6 BCD996XT’s is a Kenwood UHF radio for GMRS and a TYT MD8600 for 2m & 440 FM and DMR. The R8500 sits on top of the cabinet.
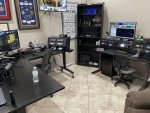
Both radio cabinets in view.
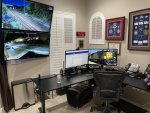
The computer desk with the wall monitors used mostly for live-streaming rail and aviation cameras.
I was pleasantly surprised to see that it arrived fully assembled, I had assumed it was going to require assembly. Being 5 feet wide the box was taller than my wife since it shipped upended. With no equipment installed it was not particularly heavy but it was a bit of work to remove it from the double box. It was very well protected and arrived undamaged.
I placed it on my wheel cart in the office. Since I already had all the equipment in the office waiting I only needed to collect a few tools and off I went. I soon ran into a minor snag, the threaded holes on the rails did not match the panels. There are two standards, I think I forgot to specify the one I needed and they sent the default one. I already had a tap for the rack screws so I grabbed the drill and drilled and tapped 8 new holes on both outside bays. The 746 panel fit right in.
I mounted the 746 in the center bay. I then mounted the 4 dual-radio panels. From the rear I installed the AC power strip, PowerPole RigRunner, USB hub and Stridsberg multicoupler.
I then ran all the interior wiring in the cabinet. Each of the scanners has an antenna jumper, power lead and serial port of course, there was also power leads for the 746 and 2 two-way radios.
After all that I moved the cabinet to the desk for final setup. The desk itself is on nylon sliders so I slid it out to connect the antenna leads and AC line cord. I placed the computer (Intel H.C. NUC) and monitor as well as the R8500 on top of the cabinet.
After testing the power leads I moved the desk to it’s place and set up the accessories (mics, computer i/o etc. After a good wipe down with a MF cloth I was done.
Since I had already set up all the racks and wiring harnesses last week it took me about 3 hours to do all the work, minus a half hour for dinner. I had not expected to even start it tonight but I already finished since I did not have to assemble the cabinet.
I already have one thing on my to-do list. The power supply that came with the 746’s rack has a loud fan. It seems to be on half the time so I think I will go to an Astron linear supply since there is no fan needed.
So here are the pics:

Here is the empty rack on the desk. I tried it to check the fit before I installed all the stuff. The radios and other stuff that is going into the rack is on the bookshelf to the left.

I installed the AC power strip on what will be the left rear. This puts the line cord on the correct side to the outlet.

Just about ready to flip the cabinet around to install the wiring.

From the rear of the right bay. This bay has the multicoupler (top) and RigRunner (bottom).

The left bay has the AC power strip, AirNav Radar Box and the power supply for the USB hub.

The wiring is just about done, ready to transition to the desk.

Here is the completed and operational setup. I am running ProScan for virtual control. Each 996XT is set to a difference screen color, matched by it’s computer partner.

A closer view of the completed setup. In addition to the 6 BCD996XT’s is a Kenwood UHF radio for GMRS and a TYT MD8600 for 2m & 440 FM and DMR. The R8500 sits on top of the cabinet.

Both radio cabinets in view.

The computer desk with the wall monitors used mostly for live-streaming rail and aviation cameras.


