In other news I got the RTL dongles today and I've hooked it up to the Chip. So far everything is running very well. Can't complain one bit. I'm currently doing the rtl_power -f 400M:520M:12.5k -e 1h UHF.csv scan. I'm about half way done with that. I'll let you know the results. So far tho, the results look promising. It should be able to handle TTD without much issues, I think. It should be noted that I installed the headless version of the firmware. I'll give a command-by-command run down of what I did to get it up and running on that platform later on. But I will say, you're gonna need to compile stuff. I needed to compile all of the RTL tools on the chip it's self. It was the only way to be sure. I also installed the HackRF tools, but while the HackRF is attached to the chip the chip will brown out and fail when doing CPU / WiFi intense operations with just the HackRF attached not even doing anything. So far, I've not seen that as an issue with the RTL dongles from NooELEC.
Ok, so let's go over the parts.
- C.H.I.P. (SoC) - US$9.00
- USB Wall Charger (Includes USB Cable - 2A) - US$7.00
- NooElec NESDR Nano 2+ - US$25.95
Total: US$41.95 (With Shipping Let's Say $50.00).
I also happened to have the HDMI DIP for the C.H.I.P. but you don't need to do that. My girlfriend got me the C.H.I.P. game system as a toy to play with and I said to myself, I bet I can get an SDR running on that platform and deploy it to departments around my area. The kit is $29.00 and it includes a USB Controller that I pretty much threw under my bed to forget about it. The HDMI dip is cool tho.
From there I installed the latest version of the firmware from
Their flashing website, that REQUIRES chrome as the flasher is a chrome plugin. For this you will need a
Jumper cables - US$3.95 or you can just use a bent out paper clip from the FEL to GRD with no DIP on top of your C.H.I.P. For my install I went with the headless version of the firmware and waited for it to flash over.
After it flashed, I removed the jumper cable (or paper clip as the case might be for you.) disconnected the power and plugged it back in. This is where it get's tricky. You're going to need the HDMI dip and a USB keyboard OR you're going to need a MAC or Linux computer handy to plug the chip into to get a TTY session running. This part is kinda complicated so I'm going to punt this section and give it to the chip forums. Go read this on how to setup the C.H.I.P. as a headless server, the
Where there's a shell there's a way section is the part you want to read on how to setup the WiFi so you can SSH into it. This section didn't work too well for me, but if you follow the ouput that he posted you can get around. It seems that for me at least my locals were not setup correctly and the curses network manager program was garabled. But if you follow his out put you can still get around. Go setup the WiFi by following his guide. Come back when you get to the
Installing software section. I'll be here waiting for you when you get back.
See that didn't take too long right? Right!?
(If it did take too long, sorry. Wasn't my guide. See that's why I punted it.)
(If it didn't take too long, hey, told ya so, you should really trust me more.)
After you setup the WiFi reboot the system, I let it boot up and waited. You'll know it's ready when the white LED starts blinking at you about once every second. You can now SSH into the chip. It's host name should be
chip it might be
chip.local on your network depending on your network config. The default user name and password for the system is
chip &
chip or you can login as
root with the same password. So please disable that account and lock the account with
passwd -l root.
sudo and
su is all you really need. Also please change the chip user account password to something else with
passwd. For extra points
upload your SSH key to the C.H.I.P. and never type a password again with
Silky Smooth Hopping! If you follow the Silky Smooth Hopping thing, you can just disable password logins all together!
Please
sudo apt update and
sudo apt upgrade (and
sudo apt install htop) at this point. It's pretty important. Now we get to the actual installing of software part of this process. This is where it gets to be really fun. Because we have to build rtl_sdr from source. But we also need to install a bunch of things to be able to build it from source. Run this commend to get all of the build dependency.
Code:
sudo apt install git build-essential libusb-1.0-0-dev cmake pkg-config
After that run these commands (from your home dir, so the first command will bring you to your home folder.) in order. You can in fact just copy and past the following code block into your terminal and it will do all of the commands correctly for you.
Code:
cd ~
git clone git://git.osmocom.org/rtl-sdr.git
cd rtl-sdr/
mkdir build
cd build
cmake ../ -DINSTALL_UDEV_RULES=ON
make
sudo make install
sudo ldconfig
sudo make install-udev-rules
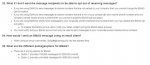
After you've gotten to this point, plugin your RTL-SDR you want to run
rtl_test and make sure that one rtl_sdr is compiled and working, and that your system can see your dongle. This should work without an issue now. The NooELEC SDR that I linked up above is rated to run for 24/7 operations. Perfect for us as we intend on using this in a mission critical application. So currently I'm running a stress test on it. I'm using the rtl_power command to have it produce a CSV file for the entire UHF spectrum (that radios would use.) I'm currently having it do that for 24 hours to make sure the hardware can keep up. I'm thinking that if it can constantly switch frequency and that's a lot more work than it would have to do when just listening to the same spectrum over and over again. It's also putting some pressure on the C.H.I.P as it's having to deal with constant writes now. A one hour CSV file produced a 32MB file. So it's going to be interesting to see what a 24 hour file will be like. It should be noted that the chip fails (system crash, due to brown out / power failure) when a HackRF is connected (no Tx/Rx, just connected) to it and you try to run the
git clone https://github.com/mossmann/hackrf.git and it's 100% reproducible on my C.H.I.P. No such issue with the RTL-SDR attached as of yet.
I also want to note that I'm running this command in one SSH window, and in another SSH window I have HTOP running. That's showing 12.9% CPU utilization with load averages of 0.08 0.08 0.08. The other SSH window is running
rtl_power -f 400M:520M:12.5k -e 24h UHF.csv. That will stop after 24 hours. Once that is done, I'll move forward and start the process of installing TTD with a piped audio output. Although a little birdy told me I might not need to pretty soon.
Just like the Star Trek: The Next Generation Episode, The Best of Both Worlds (Season 3, Episode 26 & Season 4, Episode 1) this is
To be continued . . .


")
