Status
Not open for further replies.

KG4INW

Member
Premium Subscriber
Joined
Apr 9, 2009
Messages
1,551
Location
Midlothian, VA
Excellent work and writeup! That's a quality installation that you can be proud of. I spent 7.5 years as an installer and appreciate when equipment is installed correctly.
 

K7MFC

WRAA720
Joined
Nov 18, 2017
Messages
863
Location
Phx, AZ
That’s really interesting, but I think you could be misinterpreting what they’re saying. While there’s a handy dandy grounding point right there under the hood for wiring up lights or winches or whatever else is installed out there, the important part is to not wire ground leads directly to the negative battery terminal. They must go through the chassis ground instead. I don’t think there anything especially magical about that particular grounding point, just calling attention to it so people don’t wire directly to the negative battery post that’s right there next to it.

Maybe I’m wrong.

I suppose I could have picked a random metal piece behind the dashboard to which the negative connection could be made, but I erred on the side of caution not knowing if that would be a sufficient chassis ground and used the grounding point described in the service bulletin.
 

N9JIG

Sheriff
Moderator
Joined
Dec 14, 2001
Messages
5,568
Location
Far NW Valley
Excellent work Matt!

The only question I have is visibility of the scanner display. With it pointing straight out can you see it from the driver's position without diverting too much attention from driving?

Would it be possible to pull the radio forward a bit and re-drill the interior bracket to allow the scanner to be angled upward a bit? Perhaps dropping the two-way to the lower slot would allow more room to the rear.
 

K7MFC

WRAA720
Joined
Nov 18, 2017
Messages
863
Location
Phx, AZ
Excellent work Matt!

The only question I have is visibility of the scanner display. With it pointing straight out can you see it from the driver's position without diverting too much attention from driving?

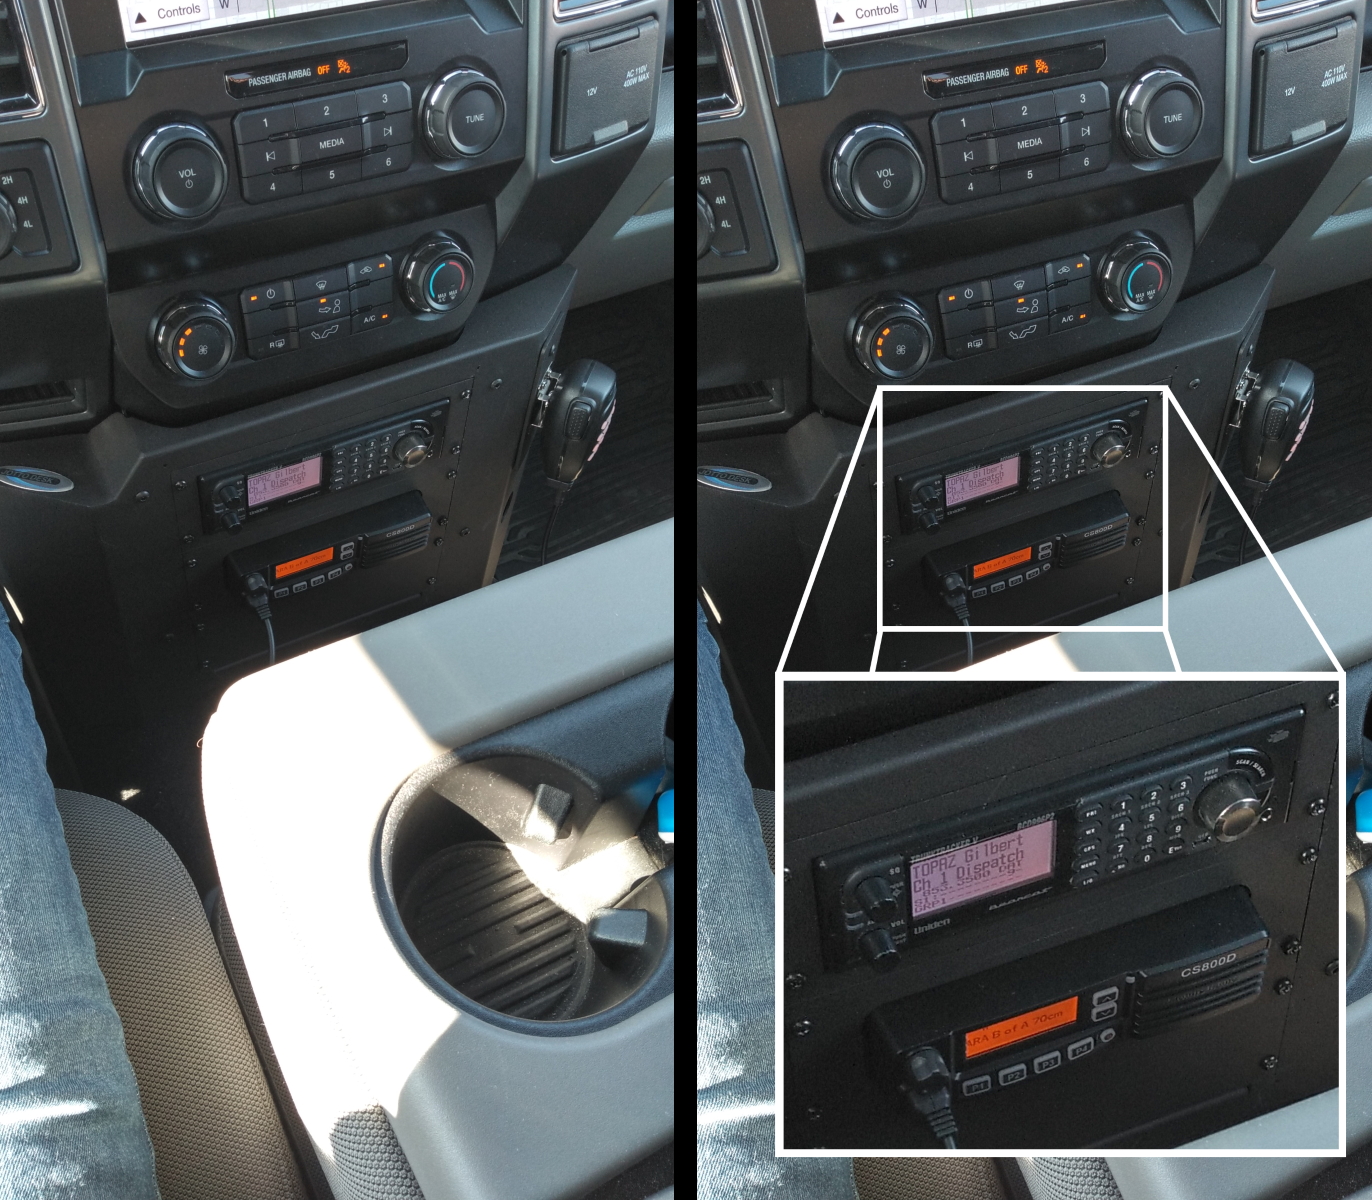
I was concerned with this when I purchased the console, but the scanner display is readable as installed, and is in the same field of vision as the HVAC controls. Here's a picture I took from my eye level in the driver's seat:

full


The picture doesn't really do it justice, but with the contrast set darker and using the white display background, I do not have an issue reading most of the display. The very top of the display is obscured, however, hiding the items on the top line - "HOLD", "SCAN", signal strength meter, squelch level, etc. As far as the ability to keep my eyes on the road, it's certainly an improvement from my previous truck which had the scanner installed in the center arm rest storage area. That required completely taking my eyes off the road and looking straight down, and forced me to only operate the scanner controls while at a complete stop.

Would it be possible to pull the radio forward a bit and re-drill the interior bracket to allow the scanner to be angled upward a bit? Perhaps dropping the two-way to the lower slot would allow more room to the rear.

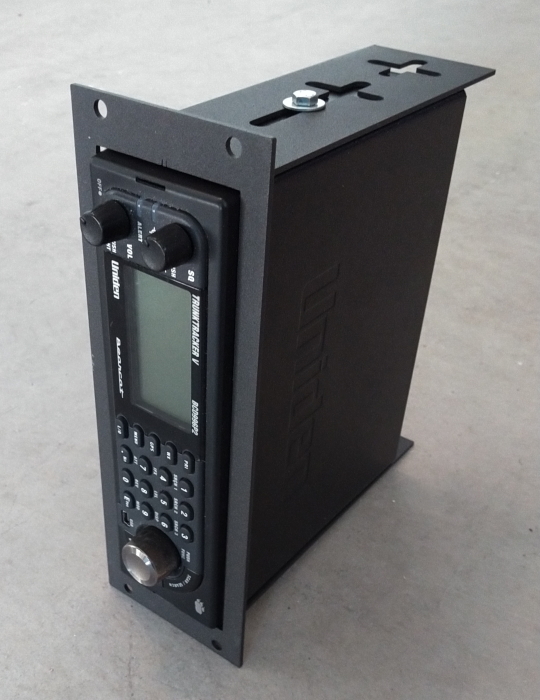
The supplied bracket unfortunately does not leave much room for modification as far as the angle at which it sits, only allowing a few millimeters of tilt upwards. I would probably need to remove material from the face of the bracket to allow any significant amount of upward tilt.

full
 
Last edited:

cmdrwill

Member
Joined
Mar 30, 2005
Messages
3,984
Location
So Cali
What size is the bolt/stud on the battery cable? Where the smaller cable attaches. Most likely Metric.
 

Attachments

  • Ford battery term.jpg
    Ford battery term.jpg
    59.2 KB · Views: 16

K9EMD

Member
Premium Subscriber
Joined
Jan 28, 2011
Messages
33
Location
Wisconsin
This is an amazing thread/topic, I am going to have to try and do something half ways as decent as this when I do an install in my Jeep Compass in Spring. Amazing job on the install and the process with pictures.
 

03msc

RF is RF
Premium Subscriber
Joined
Jun 3, 2011
Messages
3,942
Location
The Natural State
In my experience they perform very well - I think you'll be more than pleased. Keep us posted for sure on what you think.

They look good up there!
 

K7MFC

WRAA720
Joined
Nov 18, 2017
Messages
863
Location
Phx, AZ
After receiving the CS800D, I discovered that it must be programmed with the DB15 port in the rear of the radio, and cannot be programmed trough the RJ45 jack on the front panel. I needed to leave the programming cable permanently attached to the rear of the radio, and access it by removing the blank panel at the bottom of the console.

I plan on resolving this by installing a feed-though outlet on the console like this.

full

I finally completed the last thing for the install with a USB pass through connector for the CS800D programming cable:

full


I purchased this connector from Amazon and it fit perfectly in the existing hole on the Jotto Desk console. Programming the CS800D is done via a USB type A <-> type A cable. The end result is functional as well as cosmetic, cleaning up the look of the unused port on the console.
 
Last edited:

N9JIG

Sheriff
Moderator
Joined
Dec 14, 2001
Messages
5,568
Location
Far NW Valley
Great solution!

Years ago I managed a fleet of a mix of Syntor X9000, Spectra, MasterII, and Delta mobile radios. Every time we made a minor change to a channel it was a total pain in the backside to try to program or re-crystal the radios. I put in a budget request to replace them all with a fleet of 50 GM300's specifically because they could be programmed from the front mic jack without needing access to the rear. I vowed then that I would never again own or buy a radio that did not support front panel programming cable access.
 
Status
Not open for further replies.
Top